Battleship Text Effect Using Photoshop Layer Styles

It's always fun to try and recreate popular graphic effects, including those from movie posters. You may think you don't have what it takes to create blockbuster quality graphics, but after following this quick tutorial, you will be ready for the big show.
This tutorial will show you how to create a Battleship text effect using nothing but layer styles, on a background made using basic Photoshop filters and blending modes. Let's get started.
What We Will Be Making
Step 1
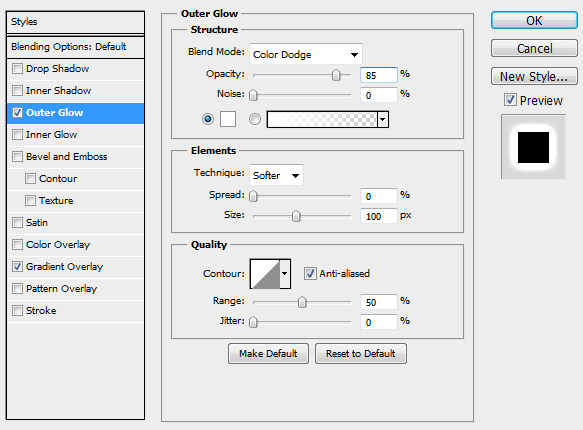
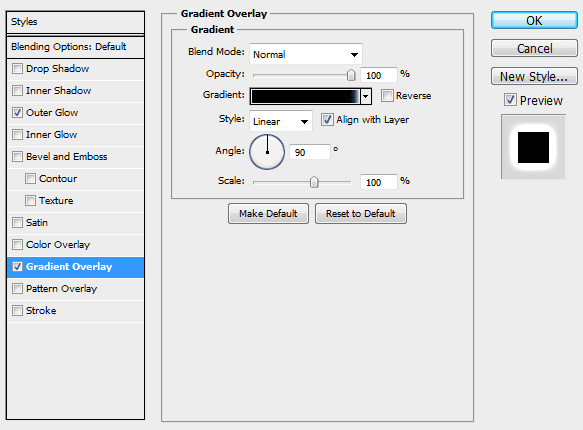
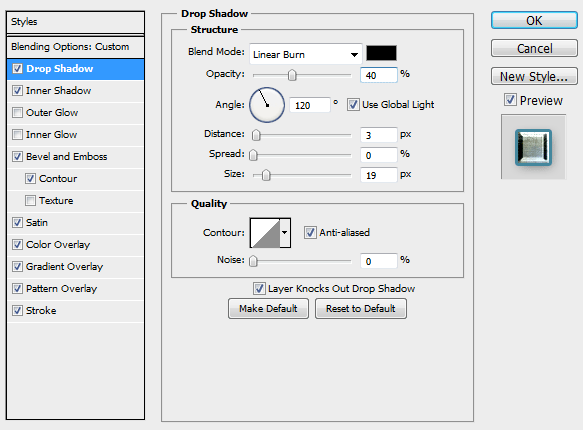
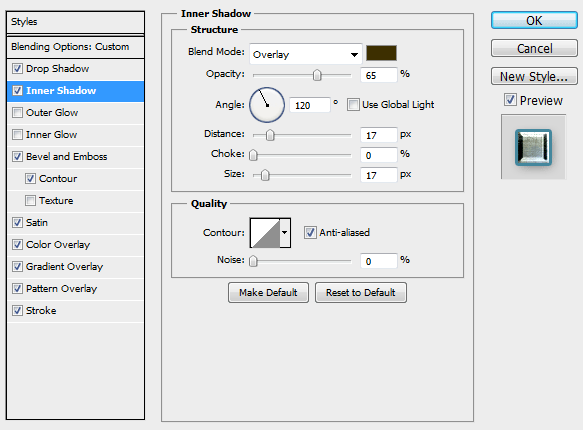
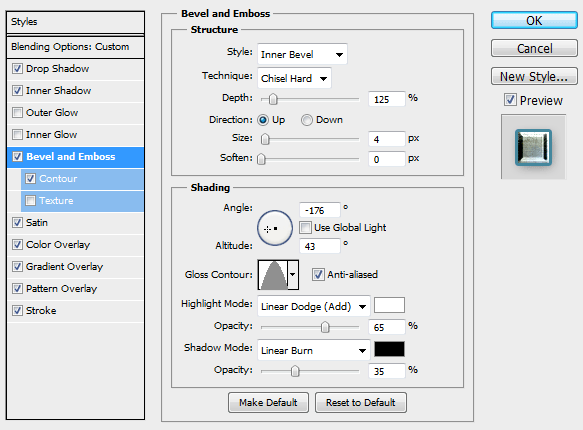
Create a new document with dimensions of 1920 x 1280 pixels. Unlock the background layer and fill it with black, then apply the following Layer Style settings.
For the gradient, use #000000 on the bottom and #001E2D on the top.
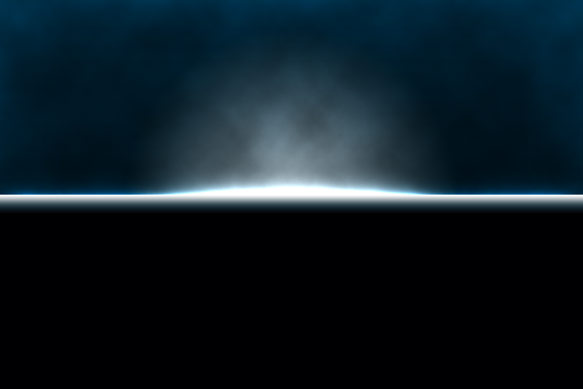
This will give us a very subtle blue glow effect around the top edge. You should end up with something similar to the image below.

Step 2
Next we will create a glowing sphere in the center of our canvas.
Create a new layer, fill it with black, and change the Fill to 0% in the Layers palette.
Apply the following Layer Style settings.
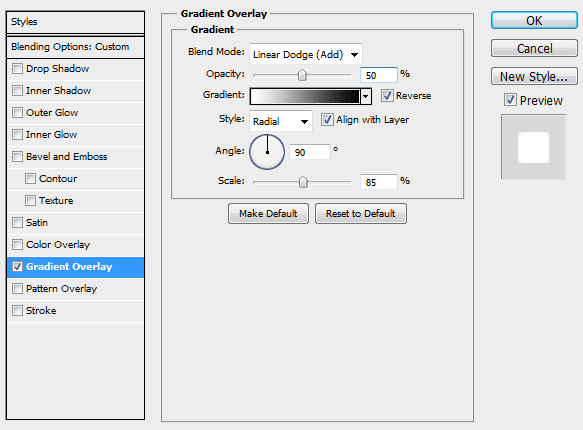
You should end up with something similar to the image below.

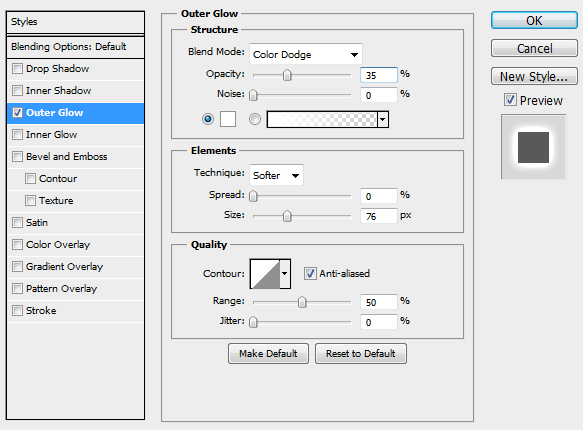
Step 3
To give our background a subtle smoky look, create a new layer, and with black and white set as your foreground and background colors in the bottom of the Tools palette, click Filter > Render > Clouds.
In the Layers palette, set the blend mode of this layer to Overlay and the transparency to 25%.
You should end up with something similar to the image below.

Step 4
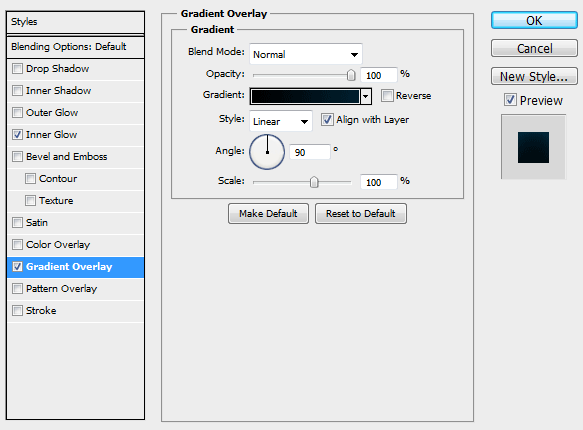
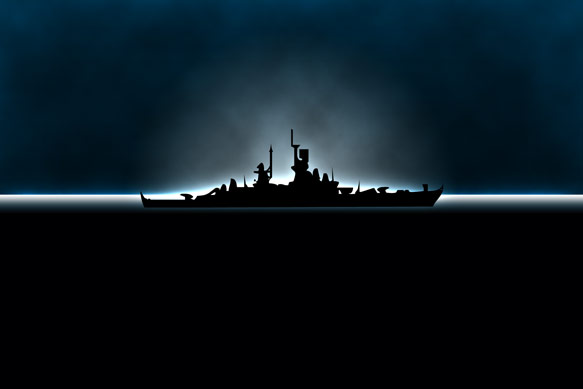
Now we will create a glowing horizon for our battleship to sit on. In a new layer, draw a black rectangle that is the size of the bottom half of your canvas, in our case, it is 1920 x 640. Move it so that it covers the bottom half of your canvas.
Apply the following Layer Style settings.
Our gradient has consists of 3 colors, #000000 with the location set to 90%, #304550 with the location at 95%, and #FFFFFF with the location at 100%.
You should end up with something similar to the image below.
Step 5
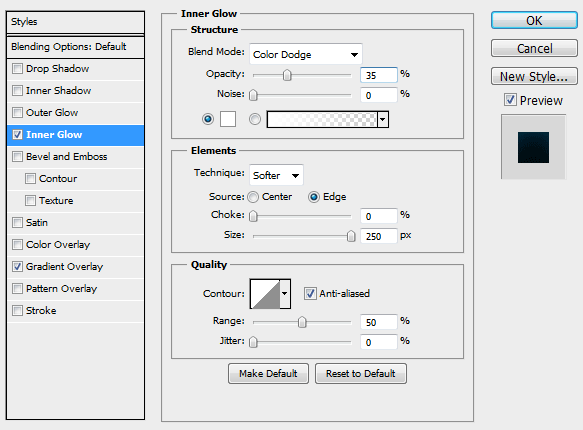
Insert your battleship silhouette onto the canvas. We used one from the amazing (and free) Vector Navy Ships from all-silhouettes.com.
Apply the following Layer Style settings, and position the shape in the center of your image with the bottom of the ship just below the horizon line.
You should end up with something similar to the image below.
Step 6
Now comes the important part. I spent a lot of time getting the text effect just right to match the real Battleship movie poster text.
The font they used is a slightly modified version of ITC Machine, which is not free. You can use a similar, more affordable (or free if you choose), font called Liberator from the Lost-Type Co-op, which is an amazing "pay-what-you-want" type foundry.
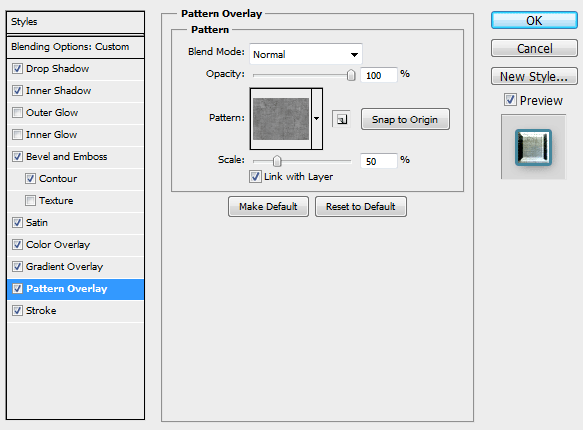
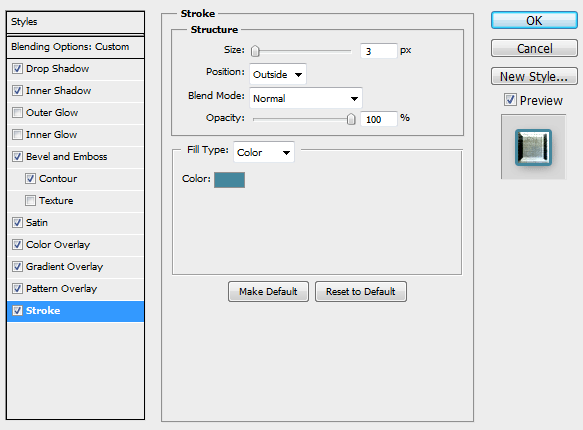
Create your title text, and apply the following Layer Style settings.
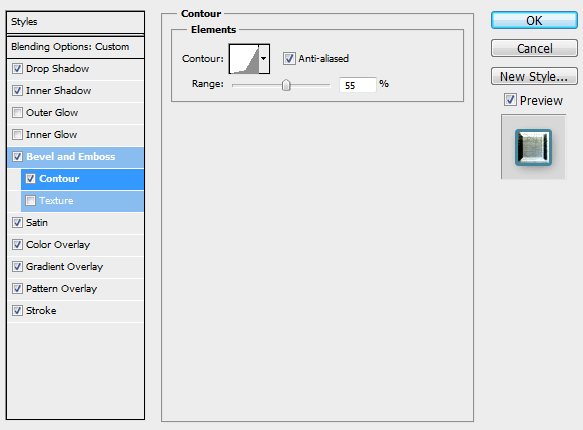
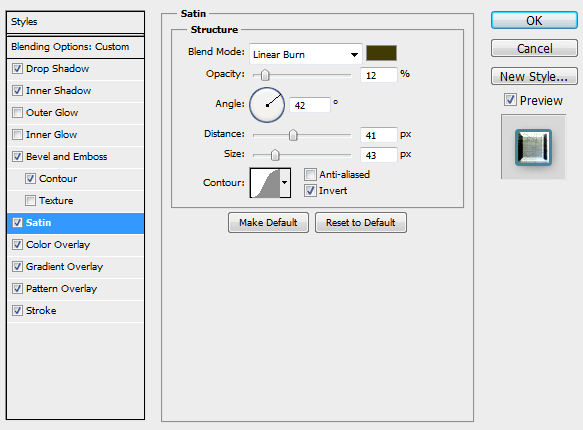
The color used for the Color Overlay is #026AB2.
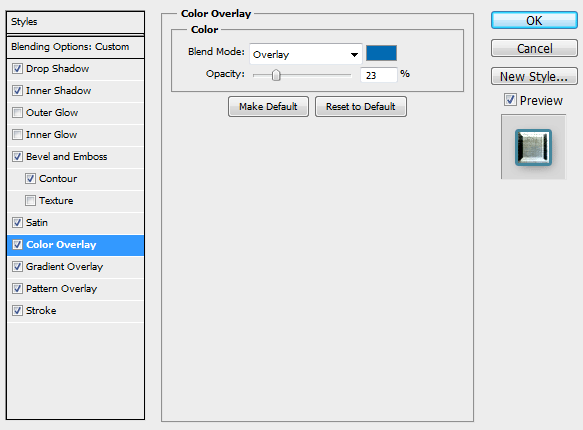
The colors and locations for the Gradient Overlay are as follows, from left to right: #FFFFFF at 0%, #5F5F5F at 30%, #FFFFFF at 77%, and #A7A7A7 at 100%.
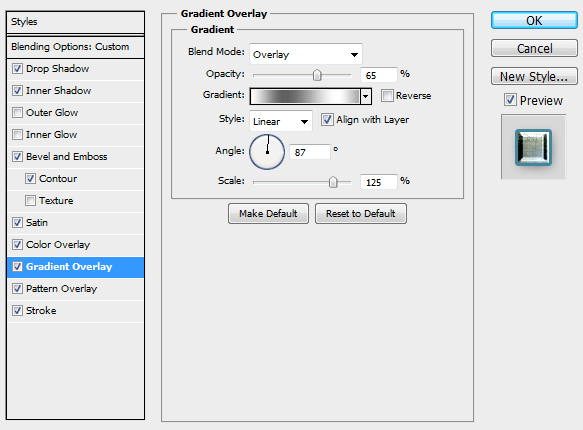
The texture we used for the pattern overlay is metal texture 7 by wojtar-stock on Deviantart.
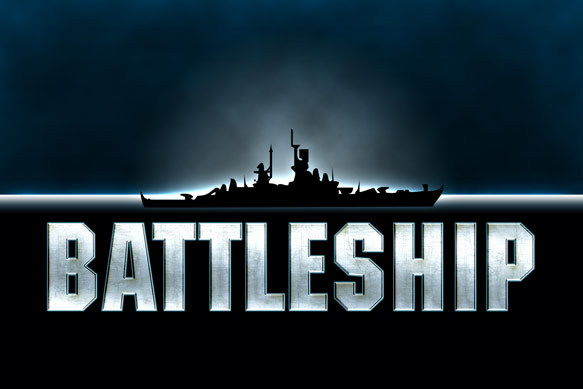
You should end up with something similar to the image below.
Step 7
Create your sub-header using the same font in a smaller size and apply the following Layer Style settings.
The colors used in the Gradient Overlay are #495052 on the left, and #DAE1E3 on the right.
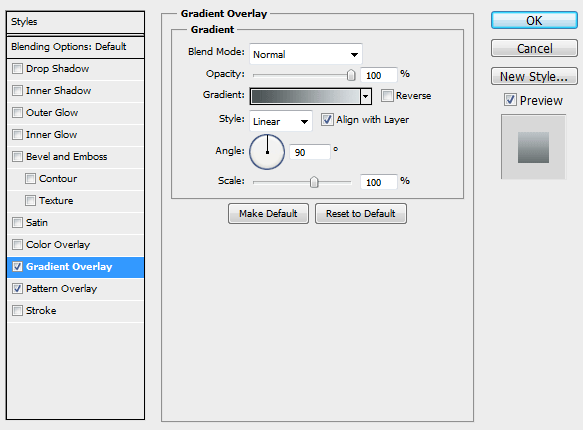
You should end up with something similar to the image below.
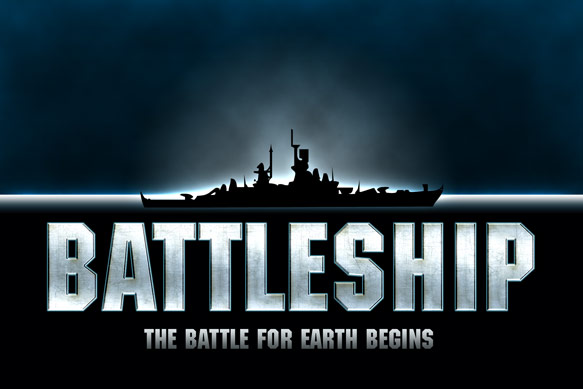
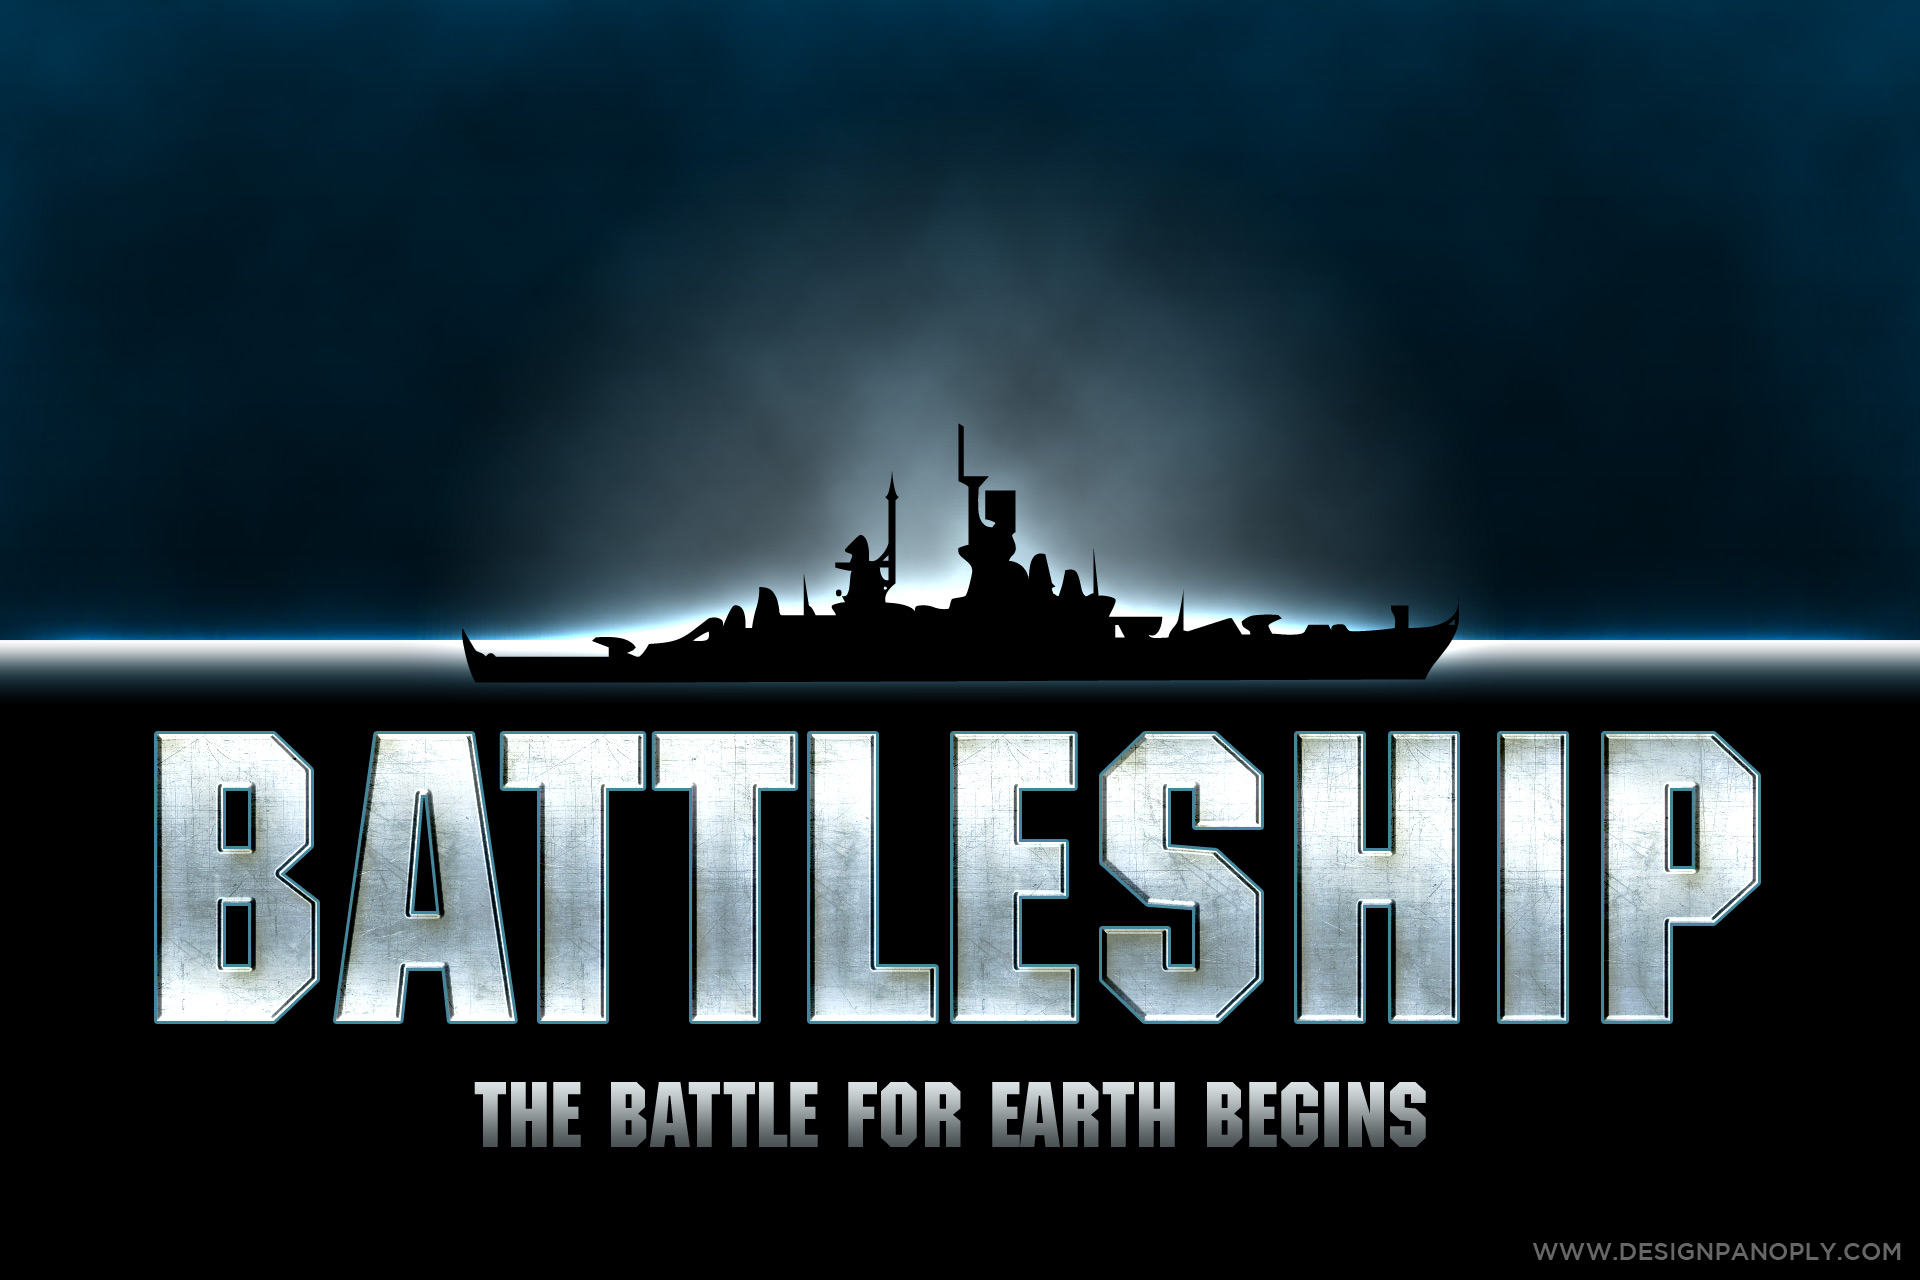
Final Image
Alternate Image
Now that we have created our base text effect using Layer Styles, you can easily create new backgrounds, making this Battleship style text effect useful in many different situations.

How did you like the tutorial? Show us what you came up with on our Facebook page!
Related Items
Grab a PanoPass now and get instant access to all these items and much more.

