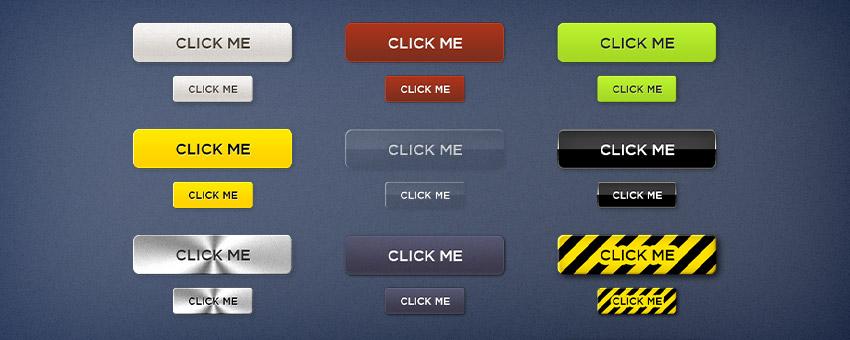
Code a Button from Photoshop Layer Styles to CSS

It's 2013! There's been a lot of rumblings within the design community about learning web design as a New Years resolution. Every day that passes where you don't know how to build a website brings you one day closer to obsolescence.
One of the coolest things about web design is how far it has come over the past years. I remember way back in the day where everyone used images for buttons because they didn't know how to do it with CSS, or it just wasn't possible yet.
Nowadays you can create all kinds of cool effects using strictly CSS, including drop shadows, inner shadows, gradients, and rounded corners. Don't worry about the people who are still using Internet Explorer 6, you can code the buttons on your website to display properly — albeit a little more boring — across even the oldest browsers.
What We'll Be Creating
Hover your mouse over the button to see the final effect. There are no images used in the creation of this button whatsoever.
Step 1
In this tutorial we are going to start with a button I created in Photoshop. It's easier to do the initial design in a graphics program and convert it to CSS later.
We'll be using a button from our Call to Action Buttons & Styles 1 product.
You can see a preview of the final button in Photoshop below.

Step 2
To keep things simple, we're going to be working from a blank .HTML file and putting both the button code and the CSS styles within the same file.
Create a blank document in your code/text editor.
To create our button, we'll use a regular link and give it a class name of "yellowbutton".
Without writing any CSS styles, our button is nothing more than a plain old link. This is where the fun begins.

Step 3
In the first part of our code, we want to set all the basic button styles before we get into the more advanced stuff like gradients and drop shadows. That way our button has a very basic style to fall back to in case your viewer is using a browser that doesn't support more advanced CSS code.
To target our link, we'll use a.yellowbutton. This tells the browser that we are styling all links with the class name "yellowbutton".

Step 4
Now that we have our basic button, let's spice it up so our site doesn't look like it was built in 1998.
The first thing we'll do is to make the button text look like it's embossed into the button itself.
We'll do this by giving it a white drop shadow that sits behind the text and is offset 1px down, and 1px right.
See the comment next to the "text-shadow" line to see what each value in the CSS does.

Step 5
Just by adding some small detail to our text, the button starts to show more depth. Next, we'll continue styling the button itself.
First, we'll give it some rounded corners. Different browsers require different CSS code, but you can create cross-browser compatible buttons by using them all at once.

That was easy!
Step 6
Next we'll turn our solid yellow background into a gradient for browsers that support CSS gradients.
Take your time and read through the code and comments until you understand what each setting does. Ask for help in the comments if you need clarification.

Step 7
Now we're going to do two things that use the same "box-shadow" property: add a highlight to the top and left edges of our button using a semi-transparent, white inner glow, and give our button a drop shadow.

Step 8
We now have a beautiful yellow button! To take it one step further, let's make the button react to our cursor when we hover over it. To do this, we'll use a.yellowbutton:hover to select any link with the "yellowbutton" class, but only when we hover over it.
The code below will reverse the colors from our original button gradient. All we have to do is copy the gradient properties from our a.yellowbutton code, and reverse the start/end colors, and change the gradient stop position for our intermediate color
I'm only showing the hover code so you can clearly see what we're adding.

Final Product
Put it all together (and remove all the comments) and you have yourself one lovely button!
Automatic Photoshop Layer Styles to CSS Conversion
It's always great when a tool comes out that helps automate something that has traditionally been done manually, like coding CSS buttons.
There are a few options out there that do this. The code isn't always perfect and some effects just don't transfer properly, so it's important to have a basic knowledge of how to do it right so you can tweak any automatic output you're working with for the best results.
Below is a list of automated tools to help you speed up the coding process, in order from best to worst.
CSS Hat (Recommended) - This is the most promising tool for automatic layer styles to CSS conversion, and it should be, since it costs $29.99. Learn more about it here.
CSS3Ps - A cloud based solution to convert layer styles to CSS. The downside is that you have to wait for things to process, so it doesn't really speed up your workflow. Learn more about it here.
Photoshop CS 6.1 - A new update to Photoshop includes a built in "Copy to CSS" feature. It's not the best, but it's a step in the right direction. Learn more about it here.
Make your New Years resolution a good one and learn some basic web design skills.
Was this tutorial helpful? Were you able to use it in your own work?

