Create a Simple Patterned Business Card Template in Photoshop
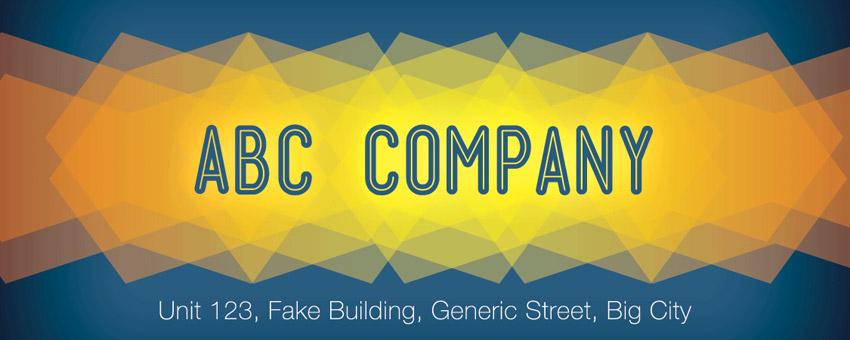
Creating a simple business card design in Photoshop doesn't have to be hard. Even a complete beginner can do it by following the right steps.
This tutorial will teach you the basics of creating text and shapes and applying different Layer Styles to create a print-ready, patterned business card in Photoshop.
Let's get started.
Step 1
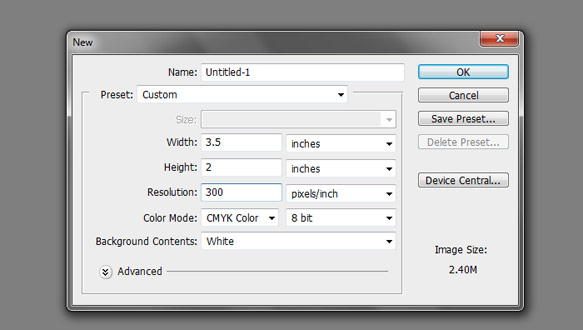
Open Photoshop and create a new document.
Set the dimensions to match the ones below.
- Width: 3.5 inches
- Height: 2 inches
- Resolution: 30ppi
- Color Mode: CMYK
Step 2
We'll start by creating our own pattern using some of Photoshop's default shapes.
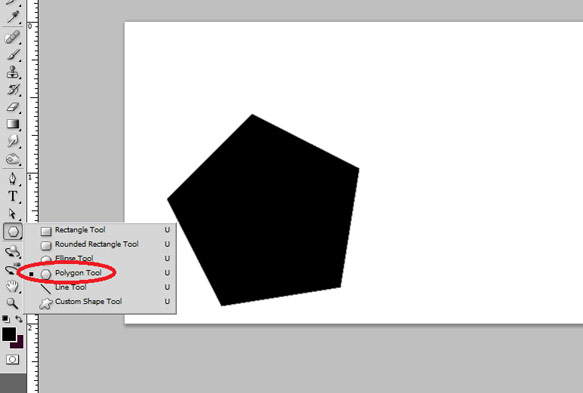
Select the Polygon tool by clicking and holding the Shape tool set in the tools panel.
Click on your canvas and set the number of sides to 5 and hit enter.
Step 3
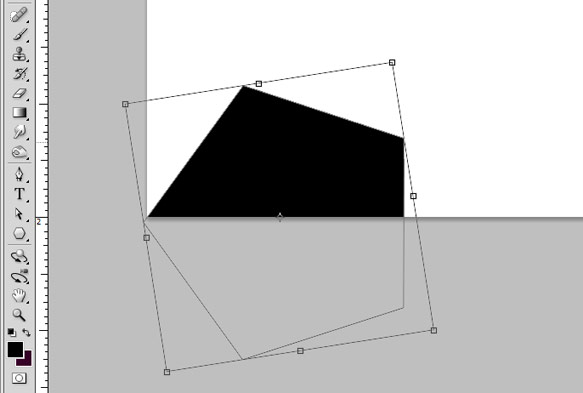
Move, resize, and rotate your shape so that it is at the bottom of our design, with only its upper half visible.
Step 4
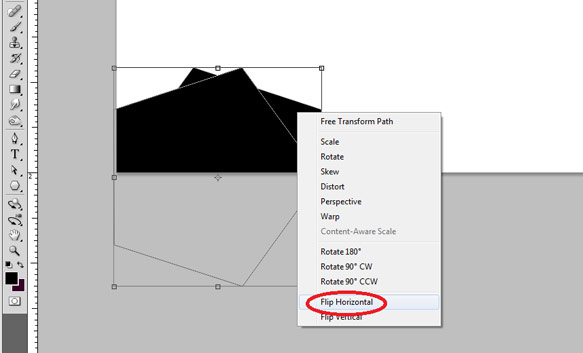
Duplicate your polygon shape by pressing CTRL+J. Press CTRL+T to start transforming this duplicate. Then, right click on it to bring up the context menu and click "Flip Horizontal".
Step 5
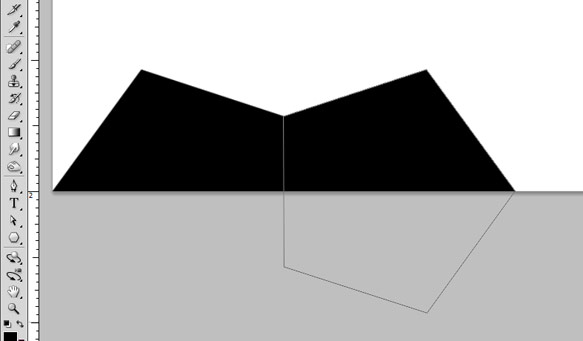
Position the shape right beside your original shape. Repeat this process several times until you fill out the whole bottom part of the business card.
Step 6
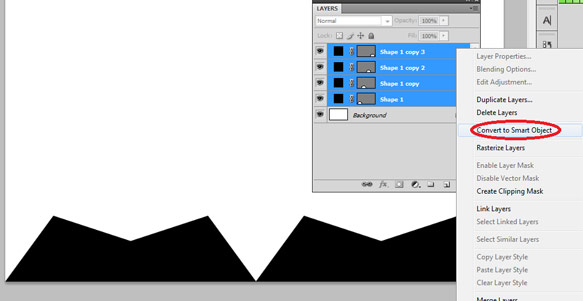
Once you have the whole bottom part done, CTRL+Click them all in the Layers palette. Right click the layer names in the Layers palette and click Convert to Smart Object to combine your shapes into one layer.
Step 7
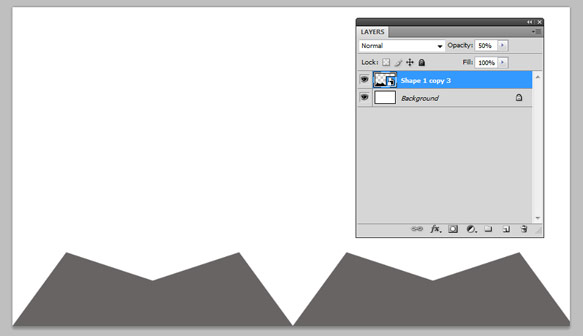
Set the Opacity to 50% in the Layers palette.
Step 8
Duplicate your layer and move it to the right or left to get an overlapping effect, as seen below.
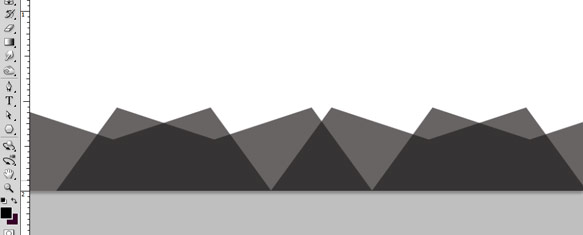
Duplicate your original layer again, and move it the opposite direction. Make sure each duplicate is moved the same distance so you get a nice symmetrical look.
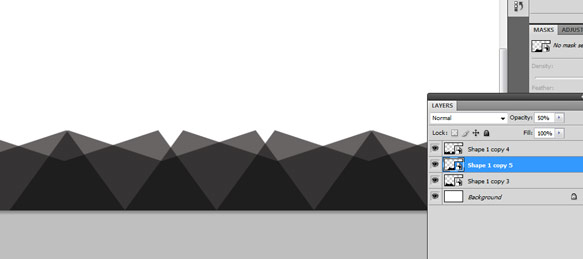
Step 9
Select all three pattern layers and duplicate them again. Move these 3 duplicates down to give our pattern a bit more depth.
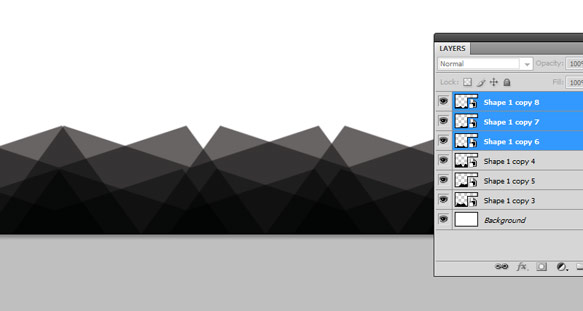
Step 10
Select all 6 of your pattern layers, right click them in the Layers palette, and click Conver to Smart Object.
Press CTRL+T, right click your new Smart Object, click Flip Vertical, then press Enter.
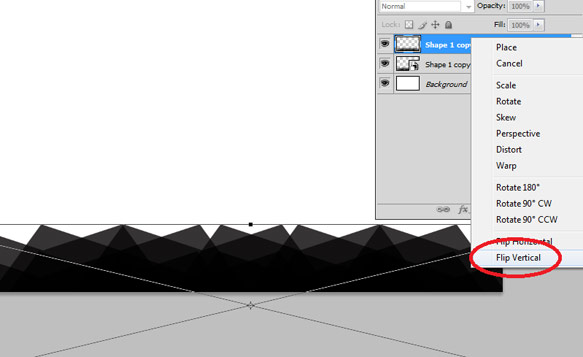
Step 11
Move your new shape to the top of the canvas.
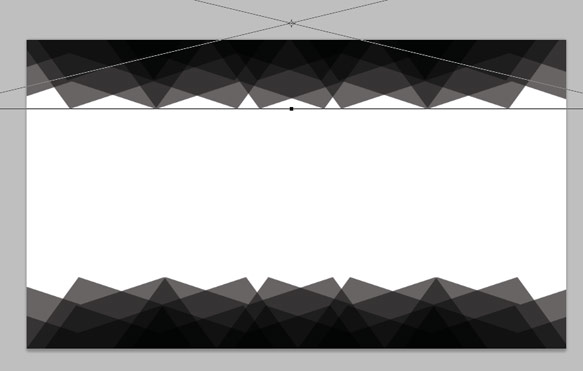
Step 12
Select both layers and, again, convert them into a single Smart Object.
Double click on name of the layer in the Layers palette to open the Layer Styles dialog box. Apply the following settings using the Gradient Overlay effect.
- Opacity: 10%
- Gradient: Orange-Yellow-Orange
- Style: Linear
- Angle: 0 degrees.
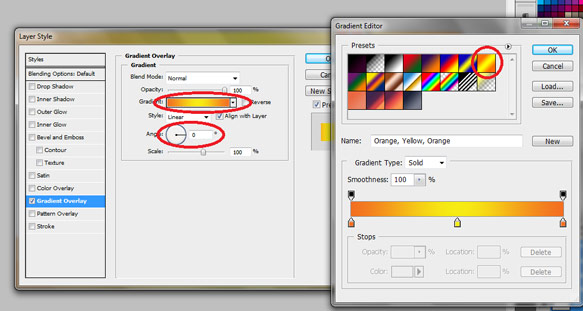
Step 13
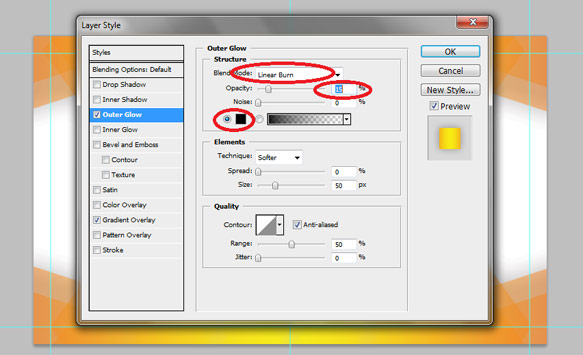
Next, apply the following Layer Style settings for the Outer Glow effect.
- Blend Mode: Linear Burn
- Opacity: 15%
- Color: Black
- Size: 50px
You should end up with something similar to the image below.
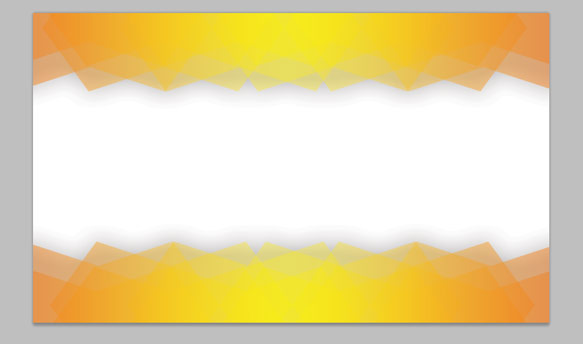
Step 14
Double click the background layer to unlock it. Double click it again and apply the following Color Overlay settings, using the color #295D80.
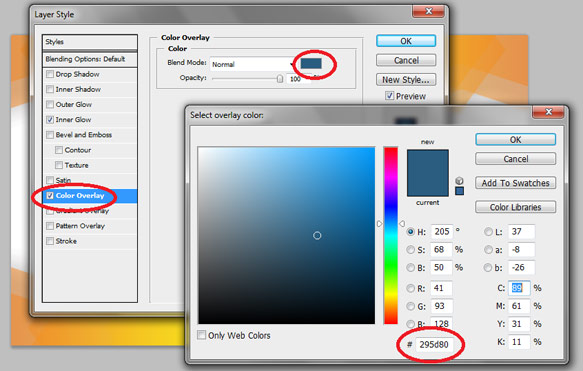
Apply the following settings to the Inner Glow effect.
- Blend Mode: Linear Burn
- Opacity: 50%
- Color: Black
- Size: 200px
- Range: 65px

Step 15
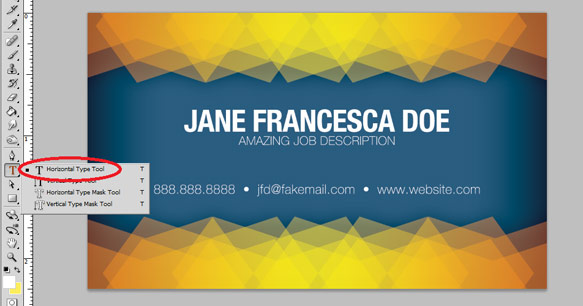
Add your text using the Type tool. We used a condensed version of the font, Helvetica Neue.
Step 16
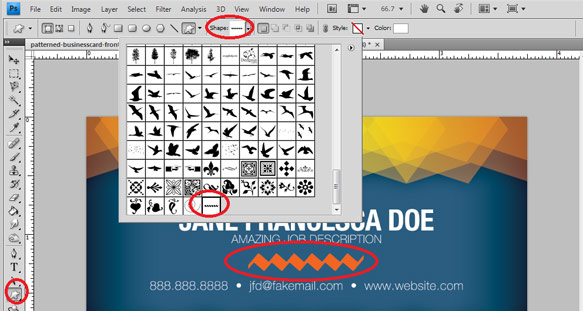
Add a zig-zag line separator using the Custom Shapes tool. Hold Shift as you draw your shape so it doesn't get stretched out.
Step 17
Right click your pattern layer in the Layers palette and select Copy Layer Styles.
Right click your zig-zag shape in the Layers palette and select Paste Layer Styles.
To get our card ready for printing, we have to add some bleed space. To do this, first add some guidelines. Press CTRL+R to bring up the rulers. Then, drag guidelines onto the edges of your design.
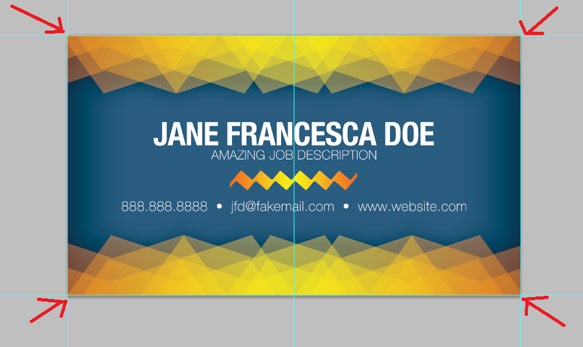
Click Image > Canvas size (CTRL+ALT+C) and increase the width and height of your canvas by .25 inches.
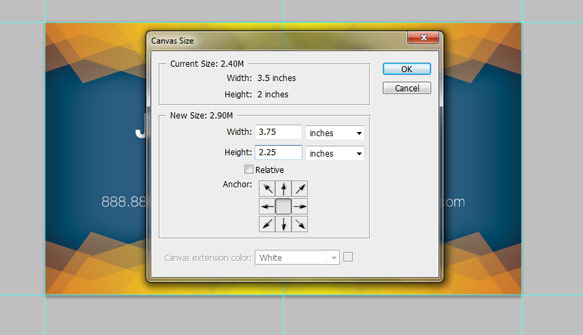
The front of our business card is complete. Make sure to save your design before continuing.

Step 18
Save the same design as a copy using File > Save As and using a new name.
Remove everything except the pattern. Move the pattern downwards until it is centered vertically on your canvas.

Step 19
Type your company name using a color similar to the background. We used the font, Mensch.
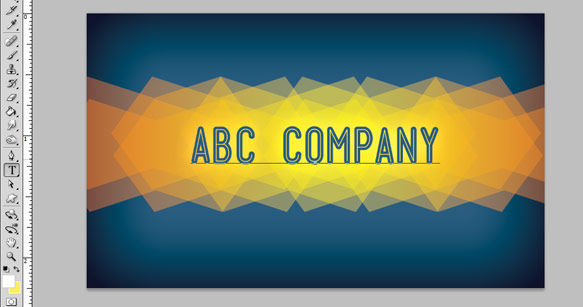
Step 20
Add your business details below. Again, we used a font with the Helvetica Neue type family.
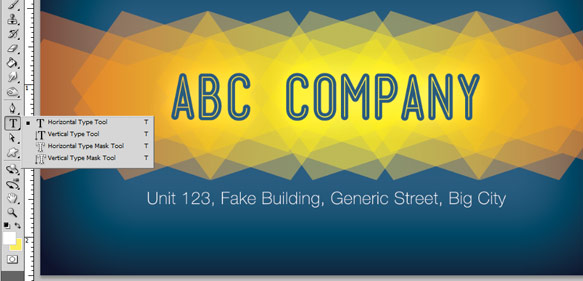
Final Image

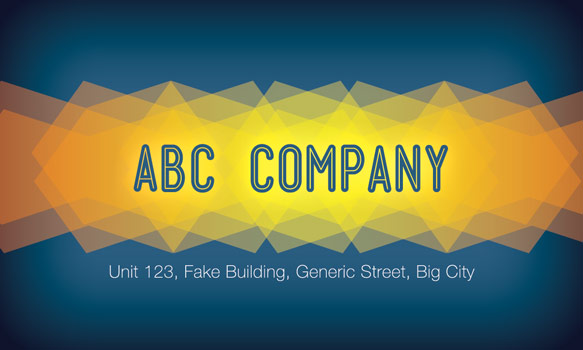
This Tutorial was Created by Kate Manhaven
Kate Manhaven is currently working as a graphic artist in one of the leading online providers of offset printing and mailing services, PrintPlace.com. She is adept in designing print ready poster designs, patterned business card templates and creative postcard art works using Photoshop and Illustrator. She also loves to write graphic design tutorials during her free time.
What do you think? Did you learn something new? Show us what you came up with!
