Guardians of the Galaxy Text Effect in Photoshop

Watch Video Tutorial
Download full HD videos and tutorial project files with a PanoPass. You'll also get instant access to everything on the site, including products, and more.
I've yet to see it, but all the reviews and box office stats are saying that Guardians of the Galaxy is an amazing movie.
This tutorial will teach you how to make a golden metal text effect, similar to the one you see on many Guardians of the Galaxy movie posters.
Step 1
First we'll create a starry, space background for behind the text.
Create a new document at 1,920 x 1,280 pixels. Fill the background with the color #0E0C22.

Step 2
Create a new layer and fill it with black. Right click that layer in the Layers panel and convert it to a Smart Object.
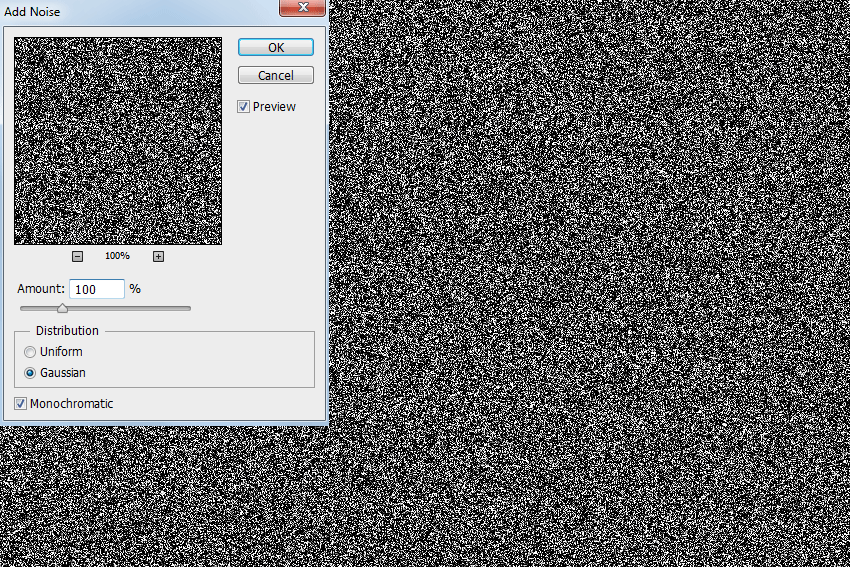
Click Filter > Noise > Add Noise. Set the Amount to 100%, the Distribution to Gaussian, and check the Monochromatic checkbox.
Step 3
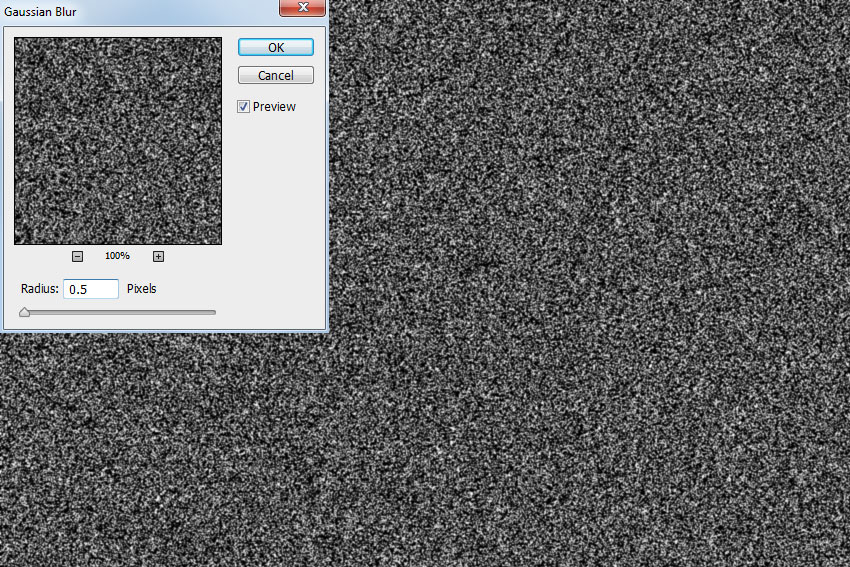
Click Filter > Blur > Gaussian Blur. Set the Radius to 0.5 Pixels.
Step 4
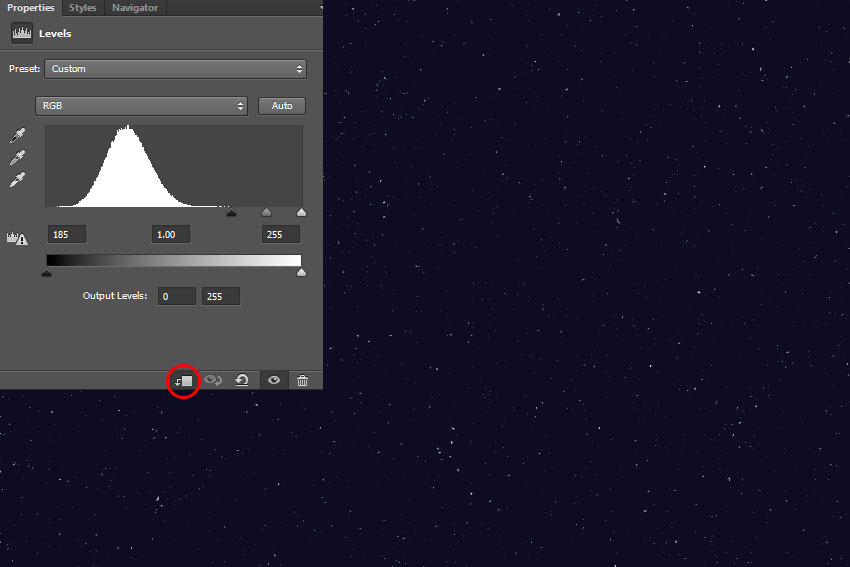
Create a Levels Adjustment Layer and Clip it to your Noise layer using the Create Clipping Mask icon in the Properties panel.
Set the black stop to 185. Set the Blend Mode of your Noise layer to Screen in the Layer panels.
Step 5
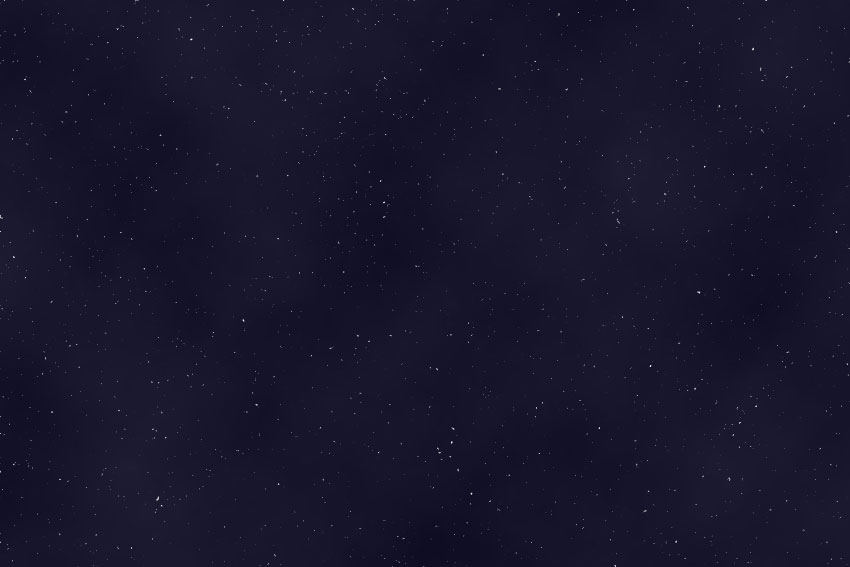
Create a new layer above all the rest and fill it with black. With your foreground and background colors sets to black and white in the left toolbar, click Filter > Render > Clouds.
Set the Blend Mode to Linear Dodge and the Fill to 7% in the Layers panel.
Step 6
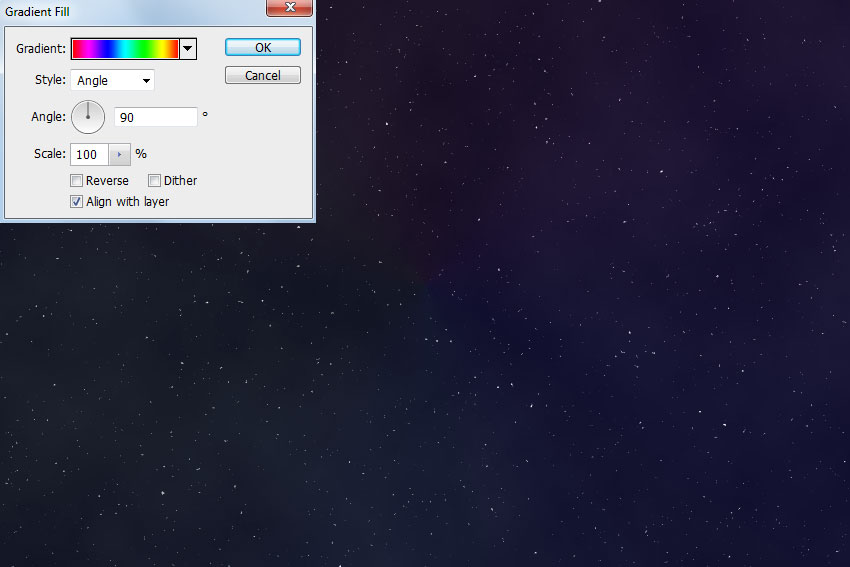
Click Layer > New Fill Layer > Gradient. Use the rainbow gradient that starts and ends with the color red. It's one of the default gradients in Photoshop.
Make sure the Style is set to Angle.
Set the Blend Mode to Soft Light and the Fill to 10% in the Layers panel.
Step 7
Next, we'll need to prepare the metal texture for use in our text effect. We're using this metal texture by wojtar-stock on Deviantart.
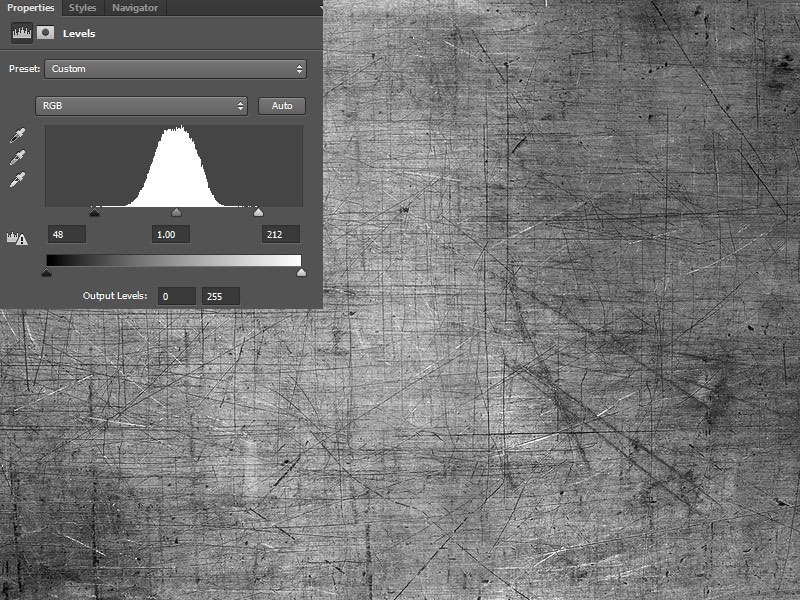
Open your texture as a new document in Photoshop. Click Image > Adjustments > Desaturate.
Add a Levels Adjustment Layer and adjust the black and white stops to the edges of the histogram.
Step 8
Now we need to make sure our texture tiles seamlessly.
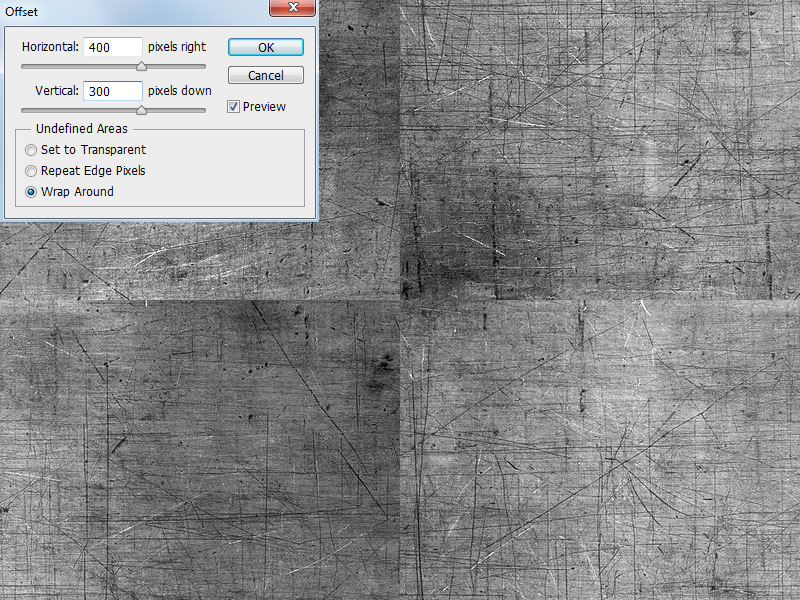
Click Filter > Other > Offset, and set the horizontal and vertical amounts to half the size of your texture. Since our texture is 800 x 600 pixels, we're using 400 and 300 for our values.
Make sure Wrap Around is selected.
Step 9
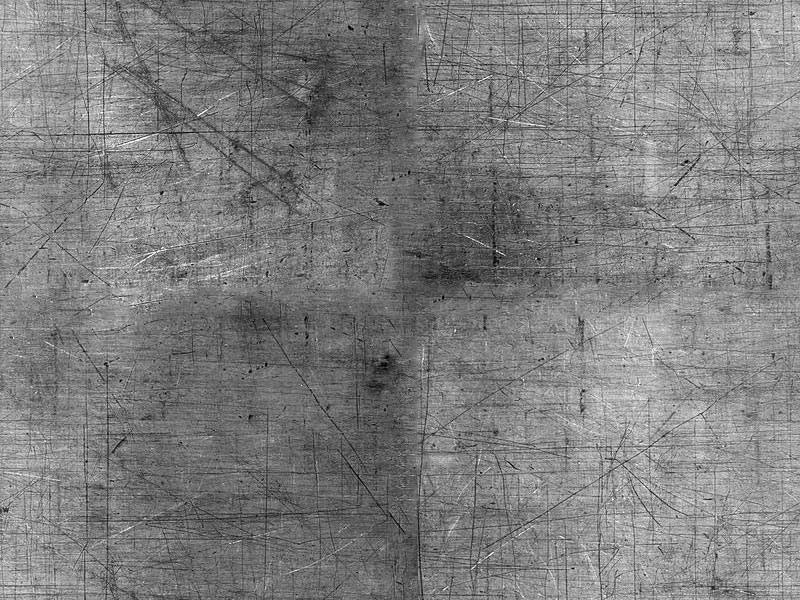
Use the Spot Healing Brush tool and paint along the vertical and horizontal seams to remove them. It doesn't have to look perfect, you just need to get rid of any hard seams.
Flatten your texture image and click Edit > Define Pattern. Give it a name and hit OK.
Step 10
As of now, there is no replica Guardians of the Galaxy font, so we'll use something similar.
UPDATE: A replica font has been released and can be found here.
We're using ITC Machine, which is not free. You can use a similar, more affordable (or free if you choose), font called Liberator from Lost-Type.
Back in your working document, create your title text using the color #DAB277.
Our text is split into 3 separate layers: Guardians, Galaxy, and Of The.

Step 11
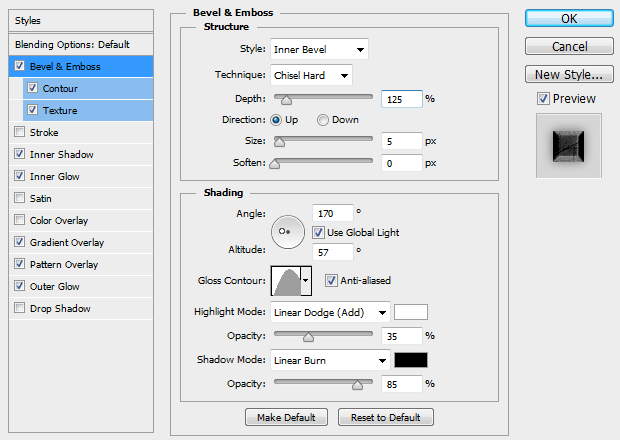
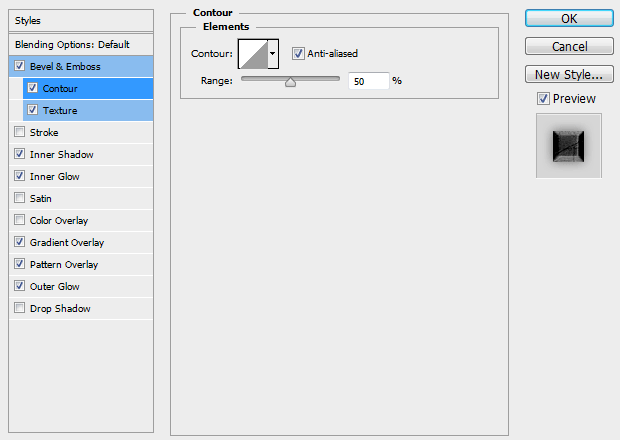
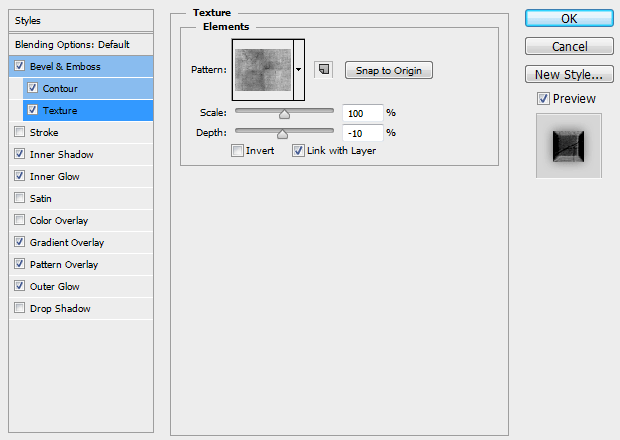
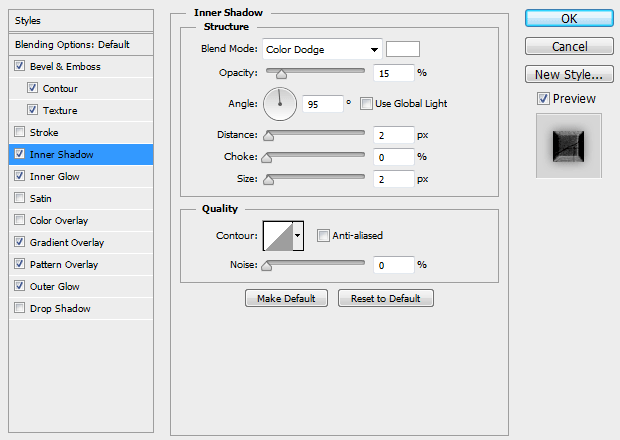
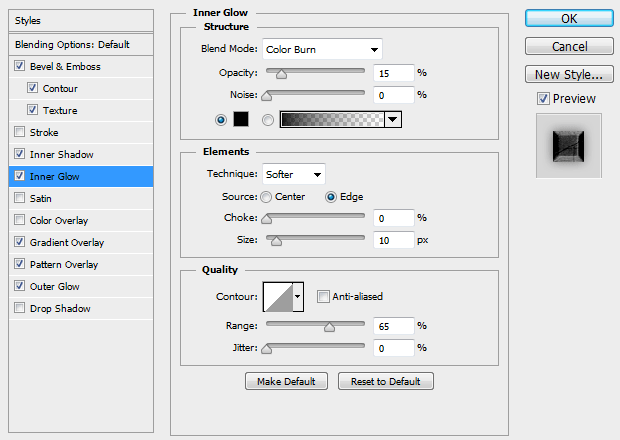
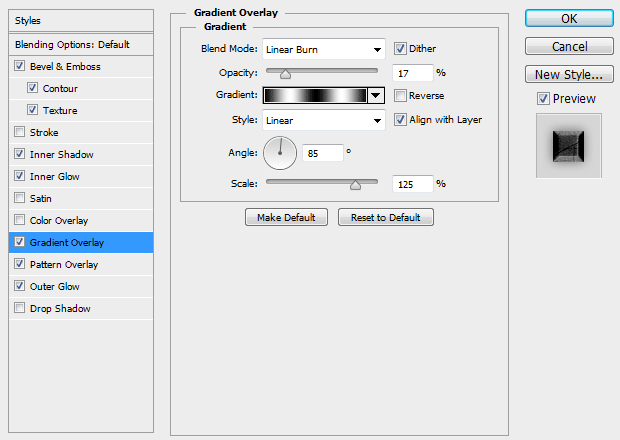
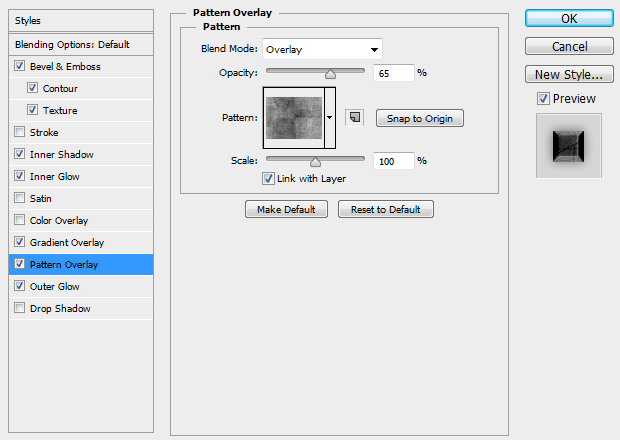
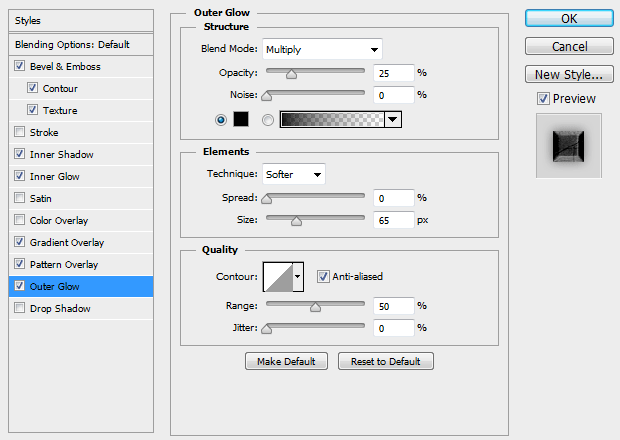
Double click the Guardians layer in the Layers panel to open the Layer Style dialog and apply the following settings.
For the Bevel & Emboss: Texture and the Pattern Overlay, use the pattern we created in Step 9.

Step 12
Right click your Guardians layer in the Layers panel and select Copy Layer Style.
Right click the Galaxy and Of The layers and select Paste Layer Style.
Change the Bevel & Emboss size of the Galaxy layer from 5px to 4px.
Change the Bevel & Emboss size of the Of The layer from 5px to 2px.

Step 13
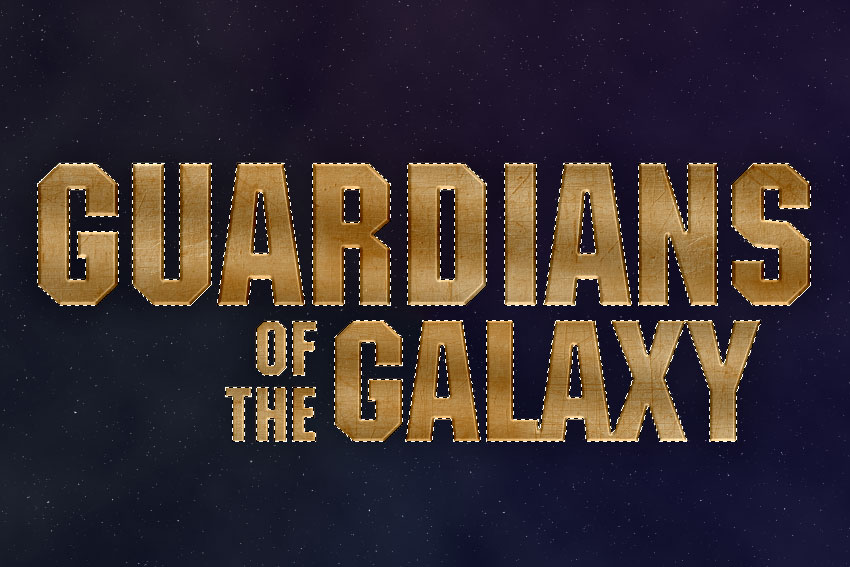
CTRL + SHIFT + click the "T" icon for your text layers in the Layers panel to make a selection around your text.
Step 14
Create a new blank layer.
Select the Brush tool, and choose a soft round brush. Set the size to 50px, and using the color white, paint random streaks across each letter.

Step 15
Press CTRL + D to deselect everything. Set the Blend Mode of your white streaks to Linear Dodge and the Fill to 15% in the Layers panel.

Step 16
Create your tagline in the color #DAB277 using the font Trajan Bold. Just like the real movie posters, our text simply says, "You're Welcome".

Step 17
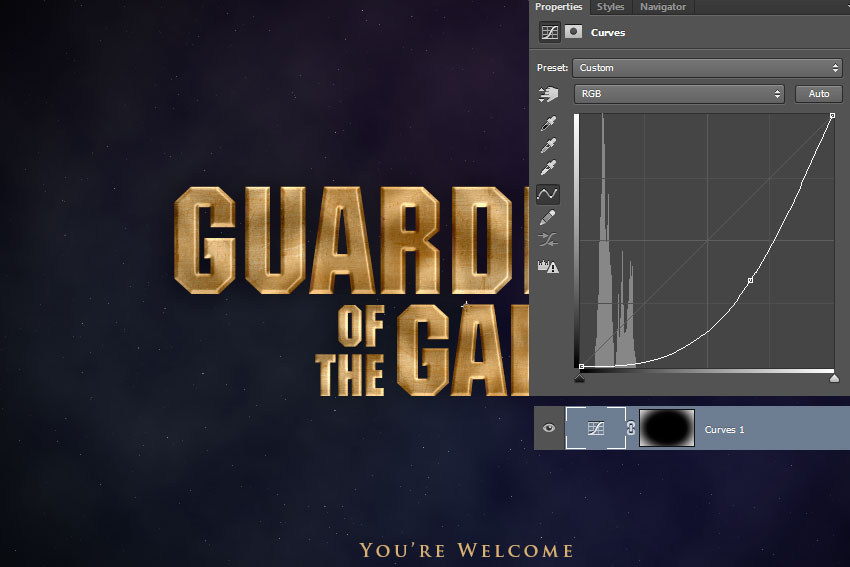
Add a Curves Adjustment Layer, and bring the center of the curve down and to the right to darken the entire image.
Add a Layer Mask and fill it with white. Using a large, soft brush and the color black, paint in the center of the mask so the Curves Adjustment Layer only affects the outer edges of the image.
Final Image
Make sure you click the image below to view the subtle texture and stars in the background.
Have you seen the movie yet? What did you think?
Show us what you made in the comments.

