How to Add Rain to a Photo in Photoshop

Watch Video Tutorial
Download full HD videos and tutorial project files with a PanoPass. You'll also get instant access to everything on the site, including products, and more.
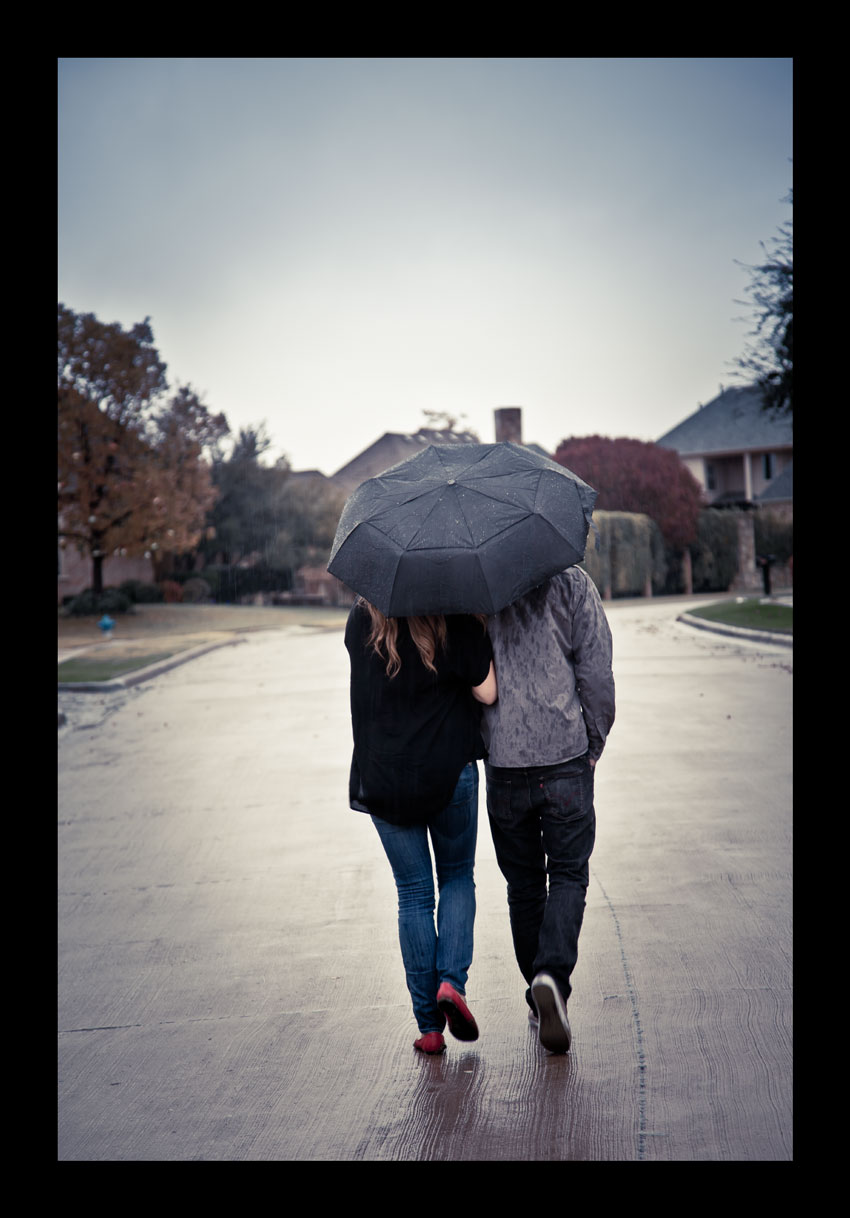
Capturing rain in a photograph can sometimes be tricky. Without the right lighting and camera settings, your photo will still look wet, but you won't see any of the actual rain drops.
This tutorial will teach you how to create some realistic rain drops to instantly enhance the mood of any photograph.
Step 1
With your image open in Photoshop, click Image > Canvas Size. Add 200 pixels to the height and width of your canvas and click OK.
Step 2
Create a new layer and name it "Rain". Fill the "Rain" layer with black.
Important: If you want your rain to be editable later on, make sure you right click your black layer and convert it to a Smart Object before moving on.
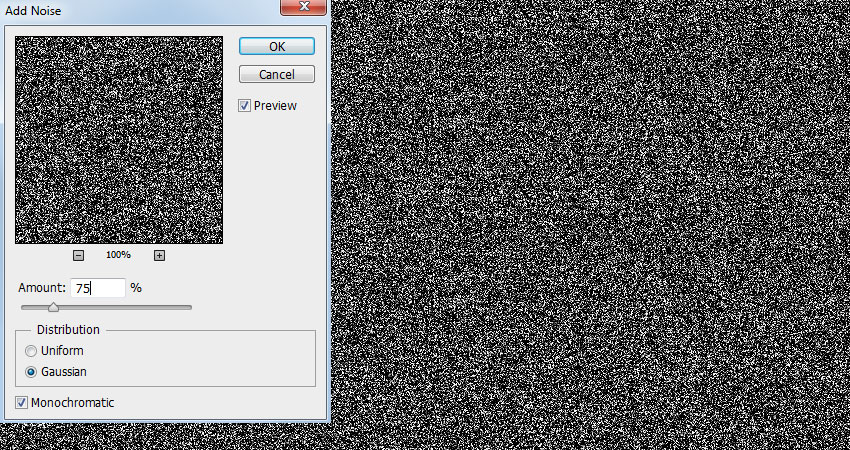
Click Filter > Noise > Add Noise.
Set the amount to 75%, the distribution to gaussian, and check the monochromatic check box.
Step 3
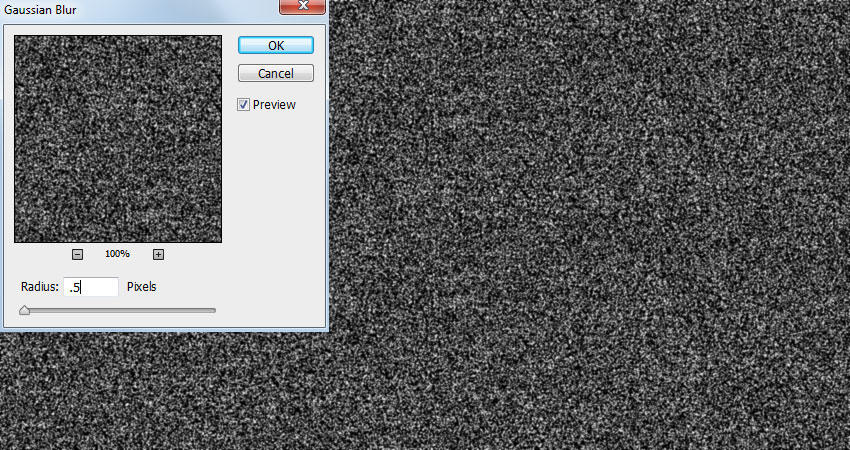
Click Filter > Blur > Gaussian Blur and set the amount to 0.5 pixels.
Step 4
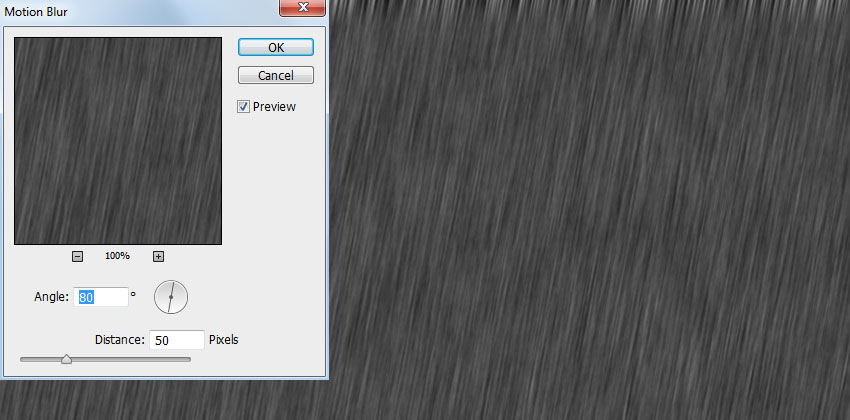
Click Filter > Blur > Motion Blur. Set the angle to 80 degrees and the distance to 50.
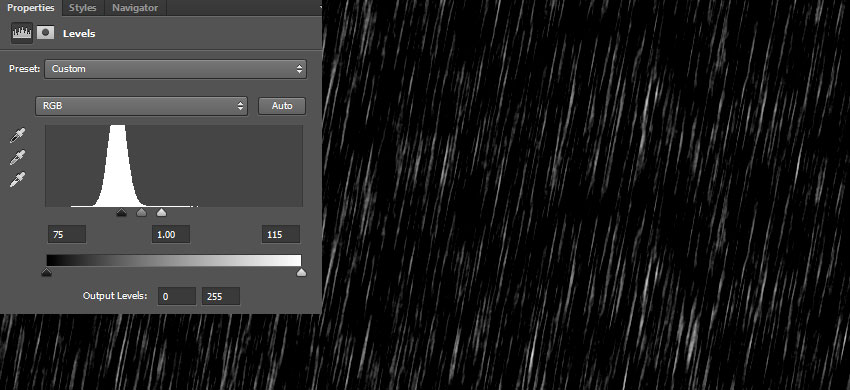
Step 5
Add a new Levels adjustment layer. Set the black stop to 75 and the white stop to 115.
Right click the Levels adjustment layer in the Layers panel and select Create Clipping Mask to apply the Levels adjustment only to the "Rain" layer.
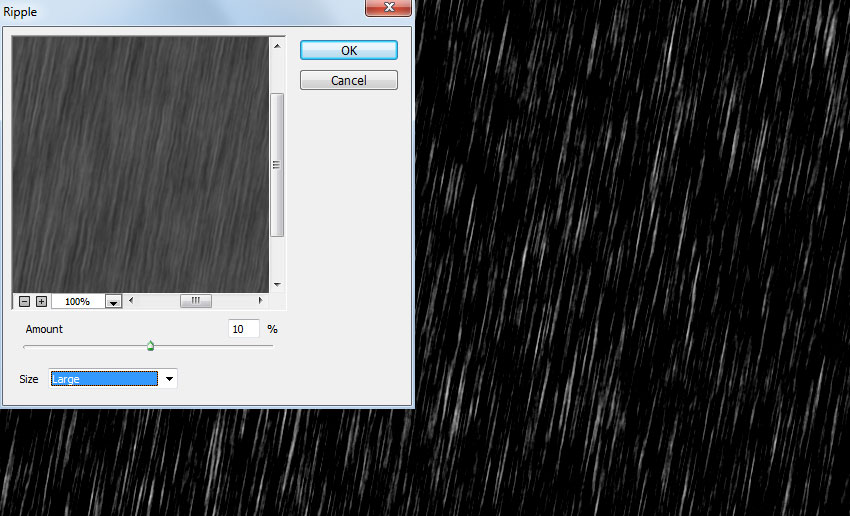
Step 6
With the "Rain" layer selected, click Filter > Distort > Ripple. Set the amount to 10% and the size to Large.
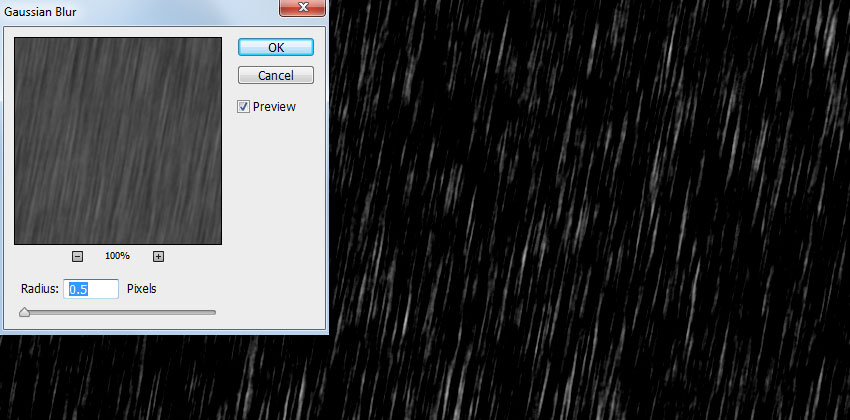
Step 7
Click Filter > Blur > Gaussian Blur, and again, set the radius to 0.5 pixels and hit OK.
Step 8
Set the Blend Mode of the "Rain" layer to Screen and the Opacity to 50% in the Layers panel.
Click Image > Canvas Size, and crop your image back down to its original dimensions.
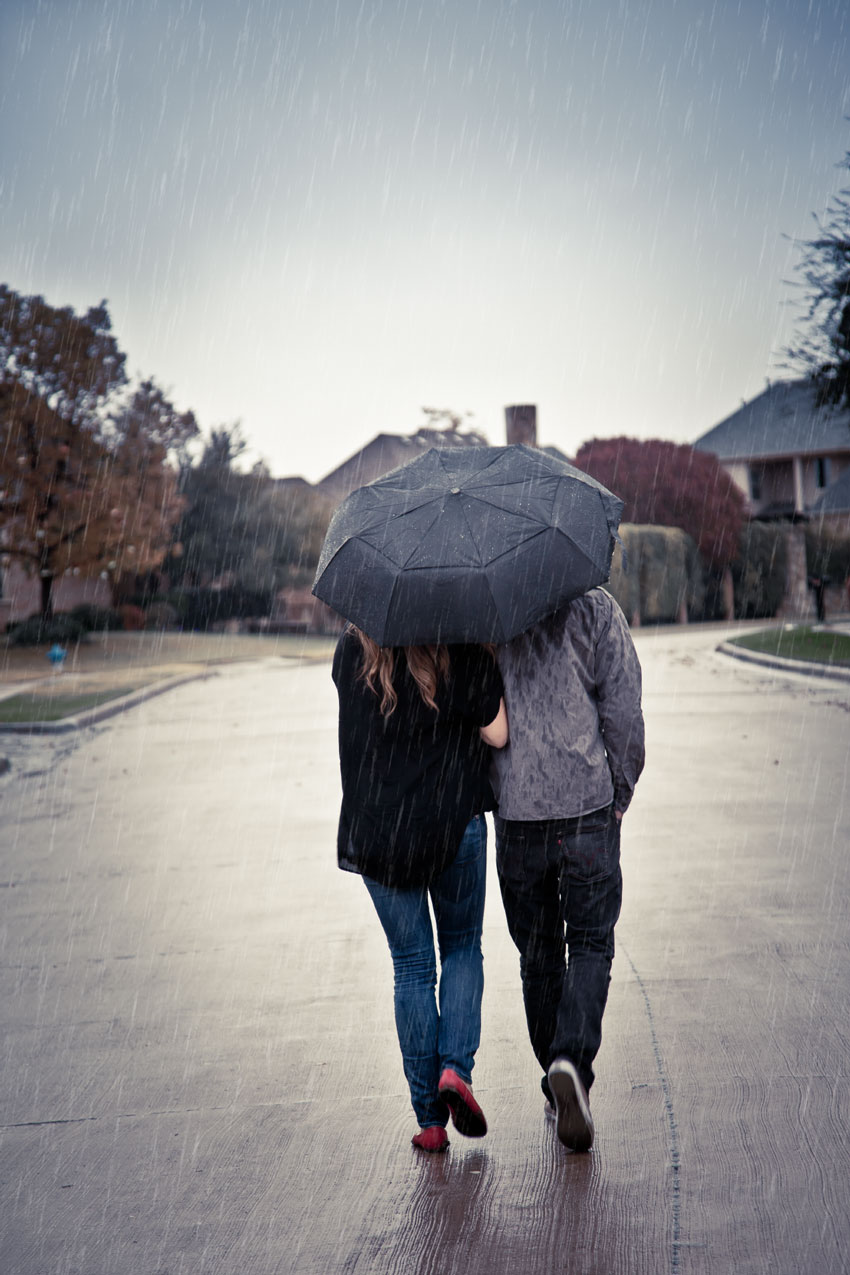
Final Image
If you converted your "Rain" layer to a Smart Object earlier, you can now go back and adjust the Motion Blur to create shorter or longer rain drops.

Have you used this method to improve a rainy image of your own? Share your version in the comments.
Related Items
Grab a PanoPass now and get instant access to all these items and much more.

