How to Create a Brushed Metal Background Using Photoshop Filters

Watch Video Tutorial
Download full HD videos and tutorial project files with a PanoPass. You'll also get instant access to everything on the site, including products, and more.
A lot of professional designers consider Photoshop filters to be a little hokey. The fact is that most of the time, they are, especially if you stick with the default settings.
By creatively combining multiple filters with some other special tricks, you can make all kinds of great looking stuff.
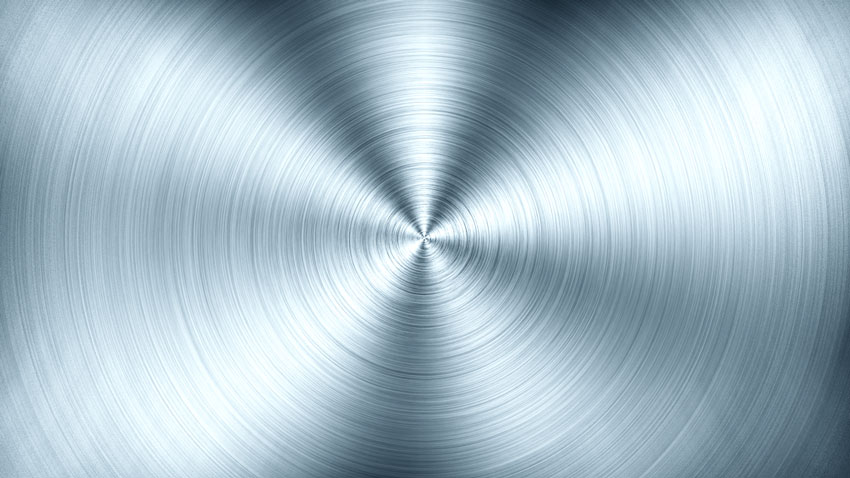
In this tutorial you'll learn how to make an editable, sleek, brushed metal background using nothing but Photoshop filters and adjustment layers.
Step 1
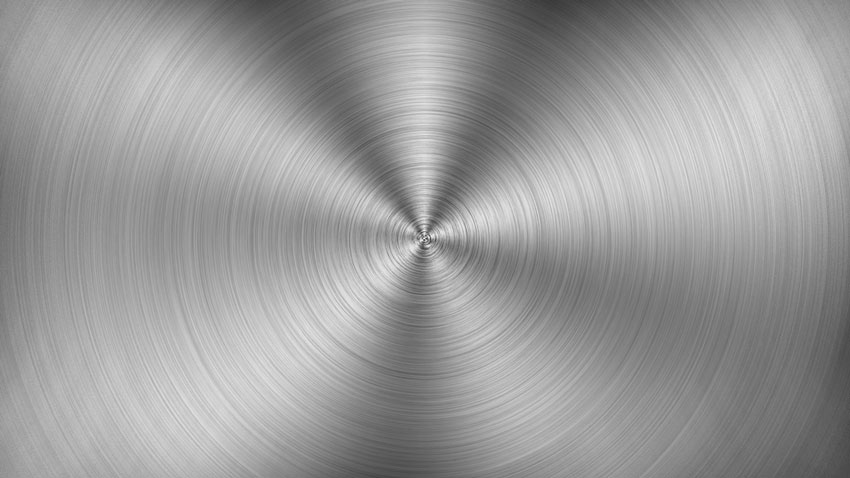
Create a new document that is 1,280 x 720 pixels. Fill the background with a dark gray color (#666666).
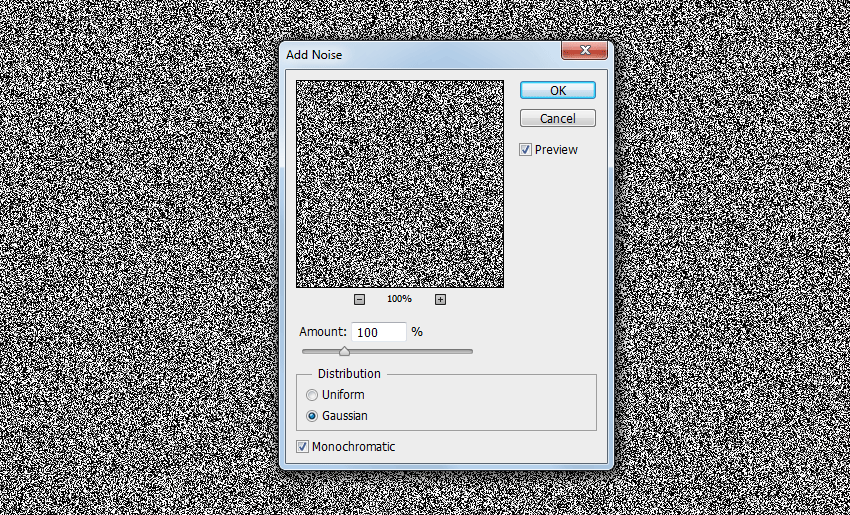
Click Filter > Noise > Add Noise. Set the amount to 100%, the Distribution to Gaussian, and make sure Monochromatic is checked.
Step 2
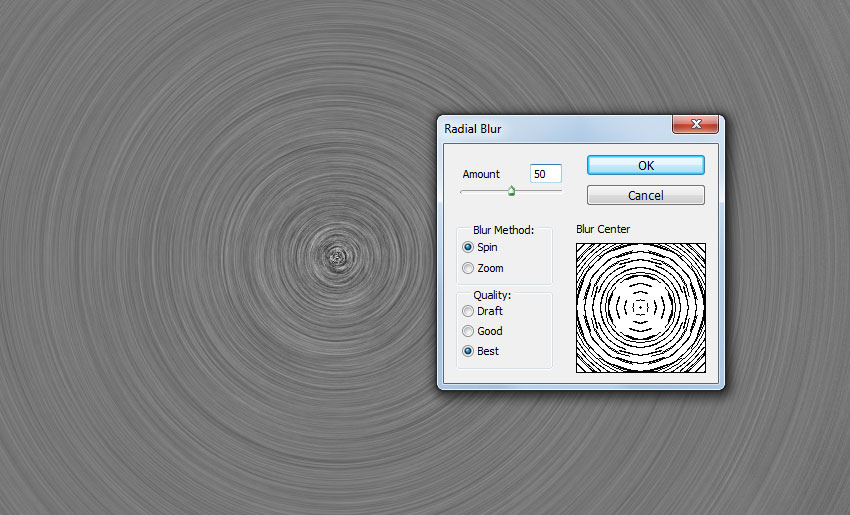
Click Filter > Blur > Radial Blur. Set the Amount to 50, the Blur Method to Spin, and the Quality to Best.
Step 3
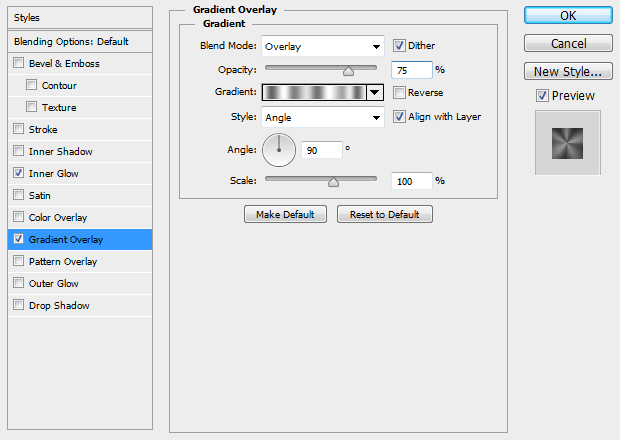
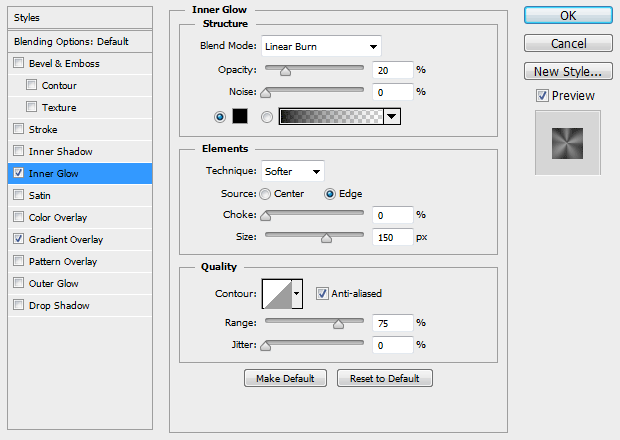
Double click the Background layer in the Layers panel to unlock it. Double click it again to open the Layer Style dialog and apply the following Layer Style Settings.
The gradient doesn't have to be exact, just make sure the first and last stop are the same color, and that you alternate between 10 or so variations of light and dark grays. With the Layer Style dialog open, you'll also want to click and drag on your canvas to center the gradient over the center of your radial blur.
Step 4
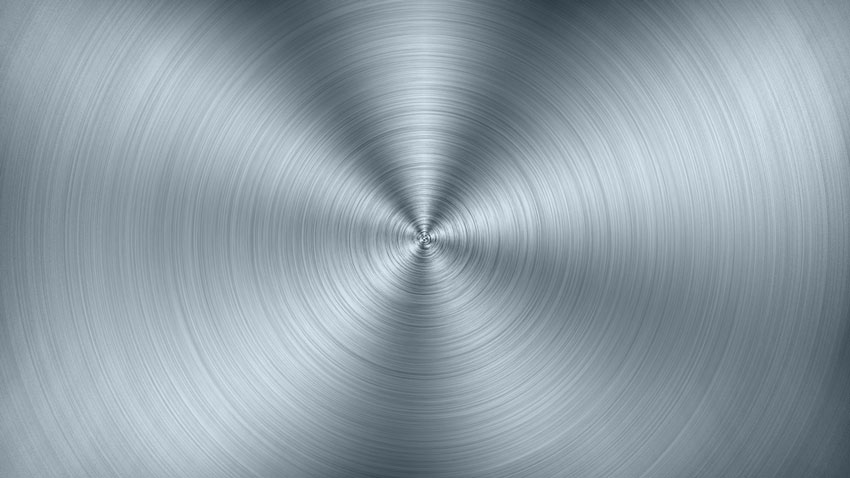
Click Layer > New Fill Layer > Solid Color to create a new Solid Color Fill Layer using the color #CBDAE3. Set the Blend Mode of this layer to Color in the Layers panel.
Step 5
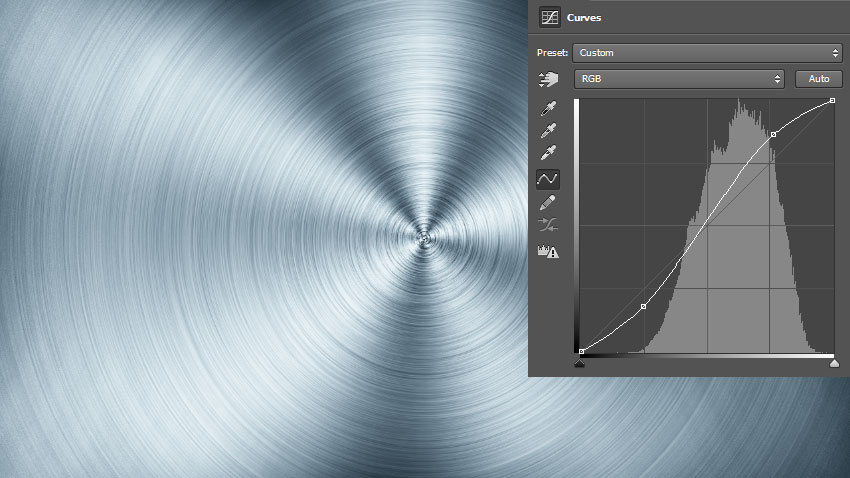
Create a Curved Adjustment Layer and give it an s-curve.
Step 6
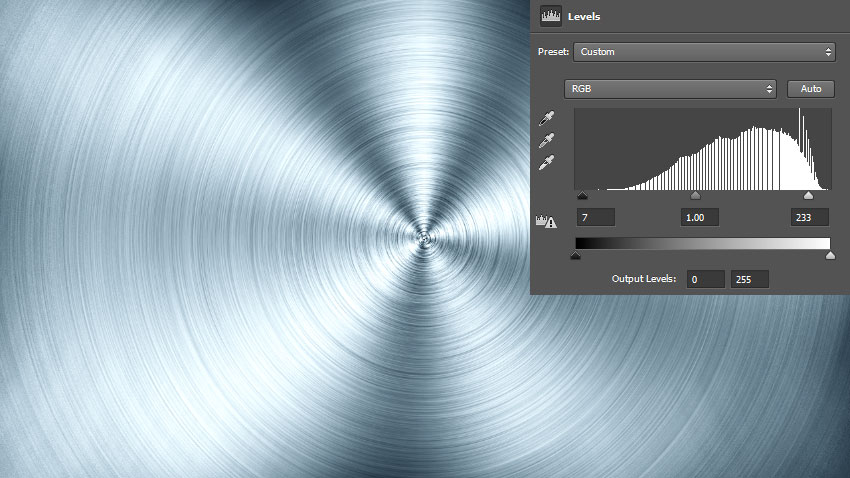
Create a Levels Adjustment Layer. Drag the black stop to the right, and the white stop to the left to increase the contrast.
Step 7
Back on your main layer. Select the Brush tool. Use a soft round brush and resize it to about 100px.
Set the brush color to #999 and the brush opacity to 50% in the top toolbar. Click once in the center of your image to soften the middle point of your radial blur.
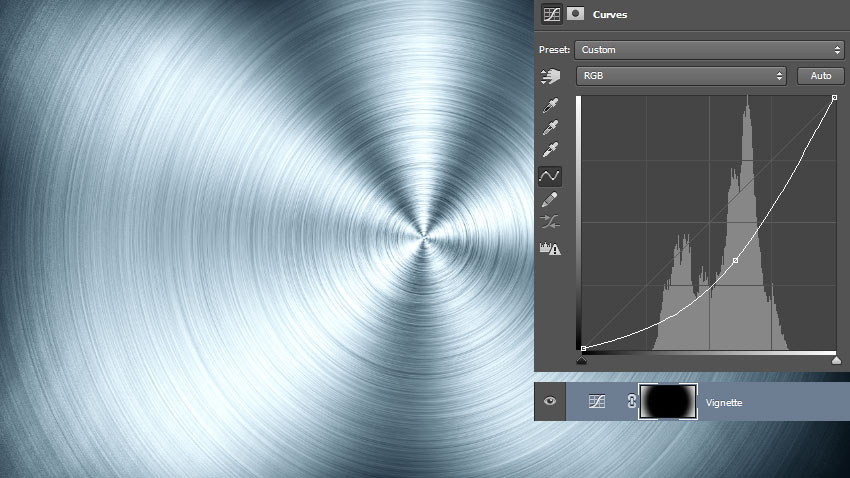
Step 8
Create a Curves Adjustment Layer and drag the center of the curve down and the the right to darken the image. Add a Layer Mask to the Curves Adjustment Layer if it doesn't have one already, and using a large, soft, black brush, paint in the center of the mask so that the adjustment only effects the outer edges of your image.
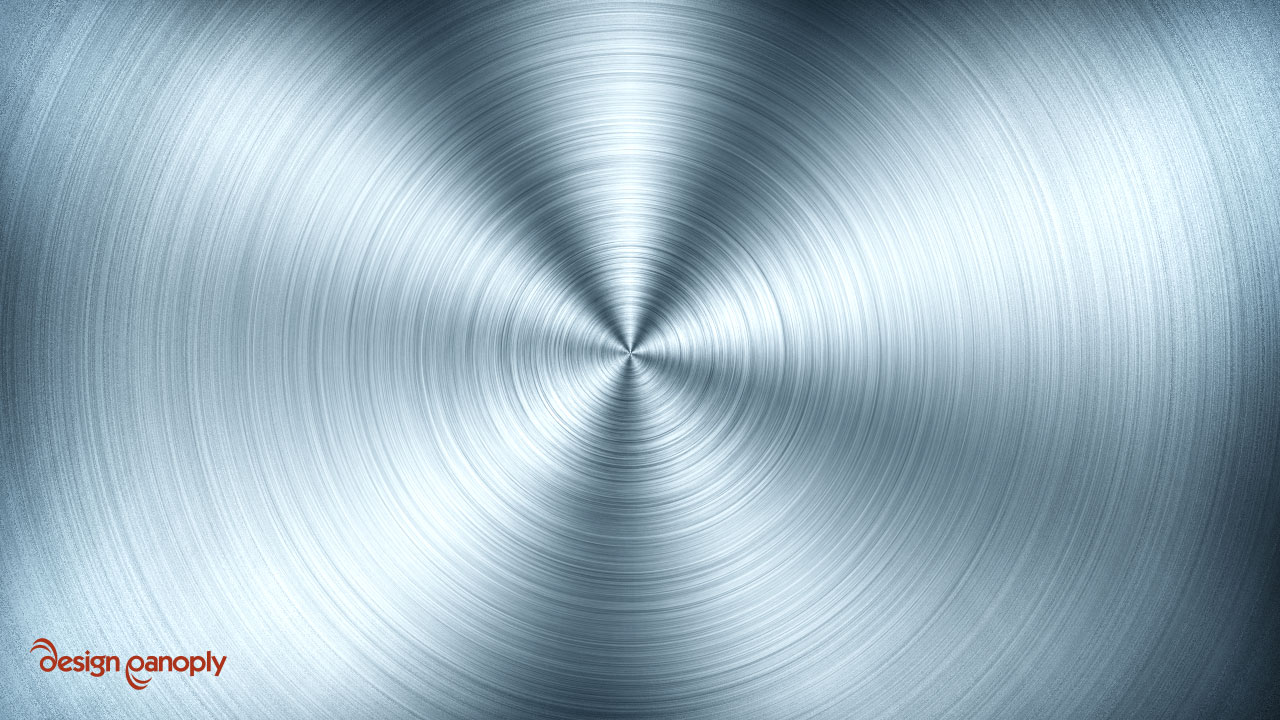
Final Image
Since everything was created using Adjustment Layers, you can go back and tweak the color and intensity of the overall effect.
Were you able to follow along? Did you make any changes to the process? Share your version in the comments.