Photoshop Brushes Advanced Features: Brush Tip Shape
Watch Video Tutorial
Download full HD videos and tutorial project files with a PanoPass. You'll also get instant access to everything on the site, including products, and more.
This series is going to teach you in-depth how the advanced brush settings work in Photoshop. In this article, I'm going to explain the Brush Tip Shape settings. These settings are the foundation of creating or editing Photoshop brushes.
In the Brush Tip Shape panel, you can change more than just the shape of your brush tip, including size, hardness, roundness, and spacing.
Make sure you also check out the previous article in this series, Photoshop Brushes Advanced Features: Introduction.
Where to Find the Brush Tip Shape Settings
The Brush Tip Shape settings are the ones you typically look at first when you're creating or editing a Photoshop brush.
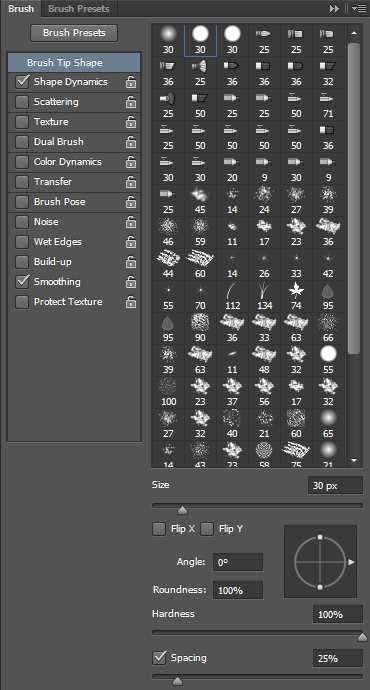
You can find them in the Brush panel by clicking Window > Brush (F5), then clicking Brush Tip Shape.
Photoshop comes with a variety of brush tips which you can see in this list. The main ones that get used are the soft round brush and the hard round brush. The other icons are art brushes, and are meant for use with a graphics tablet. We won't be covering the art brushes in this tutorial.
Step 1
In this example, I'll be starting with one of Photoshop's default, hard elliptical brushes. In older versions of Photoshop, it was near the beginning of the brush set, in newer versions, it's found further down the list.
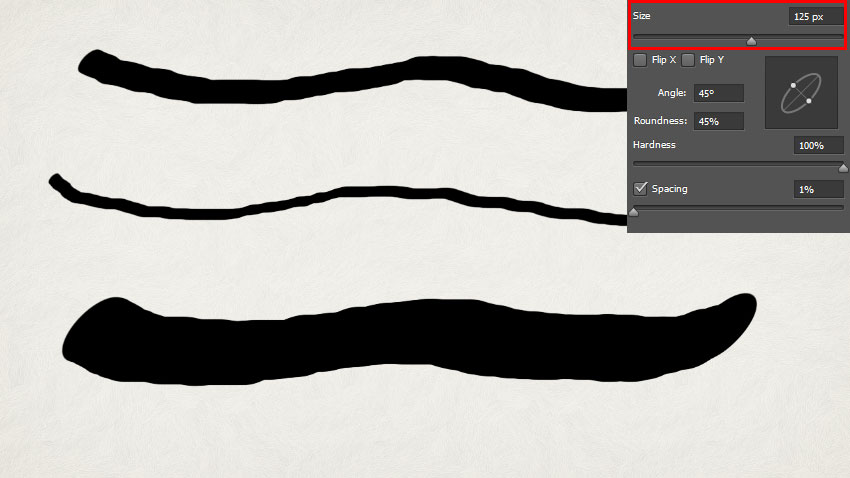
The first thing you'll see in the Brush Tip Shape settings is Size. You can always scale the size of your brush using this slider, or you can simply press the shortcut keys, which are left square bracket to shrink your brush, and right square bracket to increase its size.
The square bracket keys are located right next to the letter P on your keyboard.
Step 2
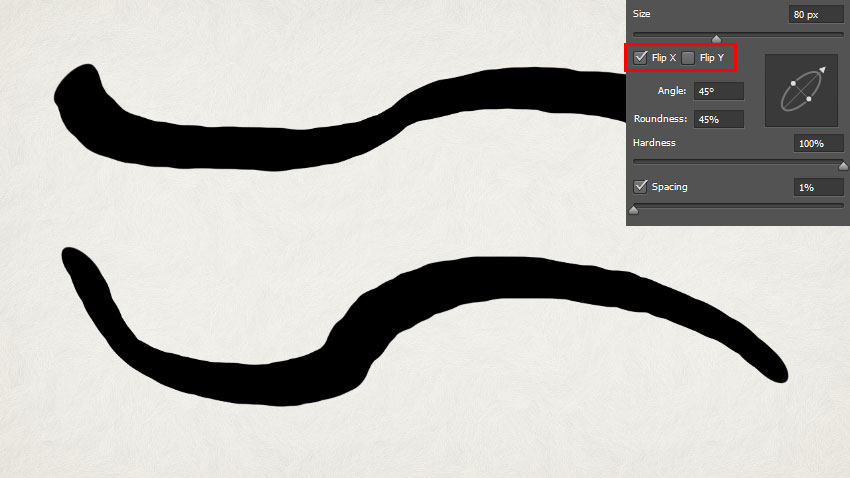
Next you see Flip X and Flip Y. If you check Flip X, your brush will be mirrored on the X Axis, and if you check Flip Y, it will flip over the Y Axis. In this case, our brush is a simple ellipse at a 45 degree angle, so flipping it on either axis will give us the same results.
Step 3
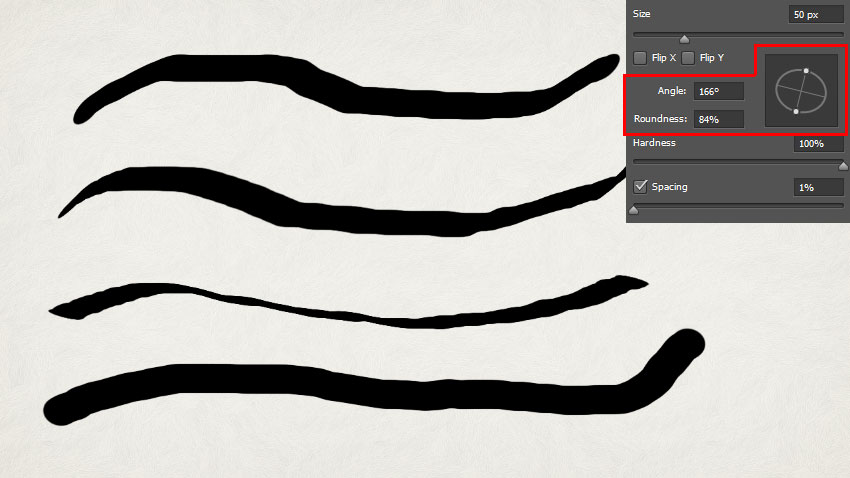
The icon on the right lets you set the rotation and roundness of the brush. You can click and drag the arrow to change the orientation of your brush, or you can click and drag the two dots to make your brush rounder or flatter. The Angle and Roundness values to the left allow to you change these settings numerically as well.
Step 4
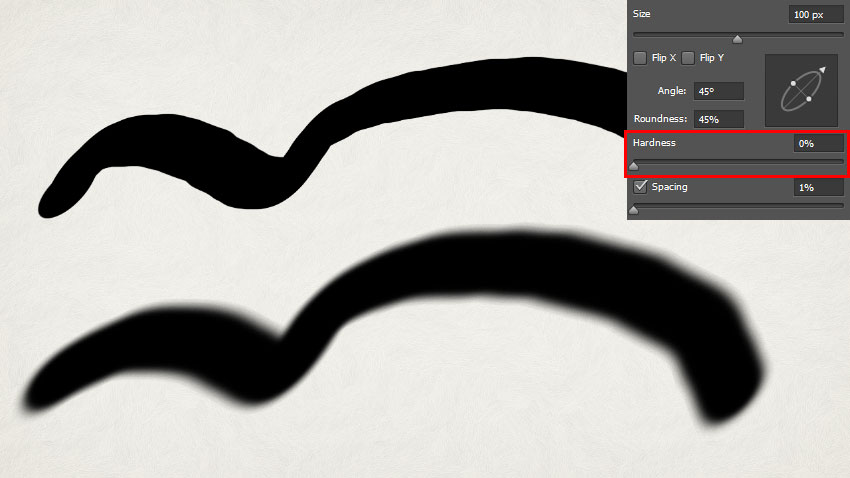
Under that you'll see Hardness, which lets you adjust how hard or soft your brush will be. 100% hardness gives you a hard edge, and 0% hardness gives you a soft, feathered edge. You can also change the hardness of your brush by pressing SHIFT + [ to make it softer, and SHIFT + ] to make it harder.
Step 5
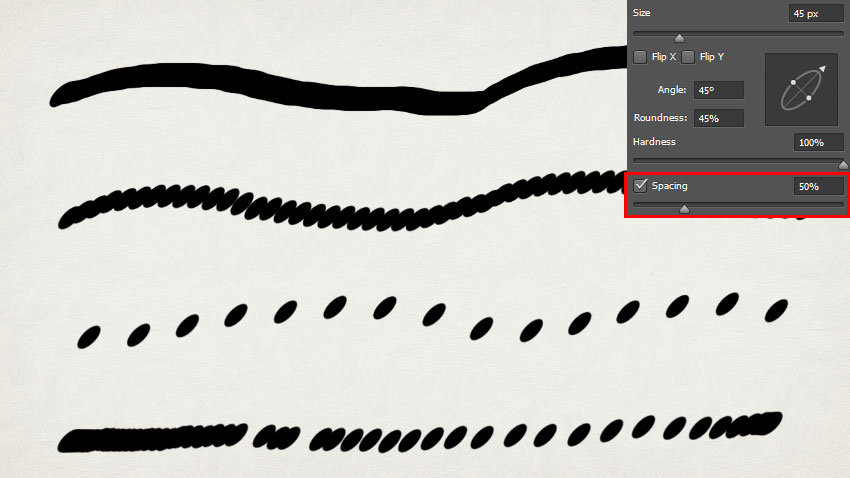
Spacing lets you adjust the spacing of your brush strokes as you paint. If you have the spacing set to 1%, you'll get a nice smooth flow, but if you increase it, you'll notice that your brush becomes more spread out. If you turn Spacing off by unchecking the checkbox, your brush spacing will vary based on how fast or slow you paint.
Did you learn something new? Share your thoughts in the comments.
Now that you know the basics of working with the Brush Tip Shape settings, you can move on to the more advanced features.
