Realistic Patterned Vintage Card and Ribbon

Vintage designs convey a sense of great character and nostalgia and are perfect when you are in need of a warm, inviting feeling.
This tutorial is going to show you how to create a textured vintage card and ribbon graphic using vectors, textures, and layer styles.
Let's get started!
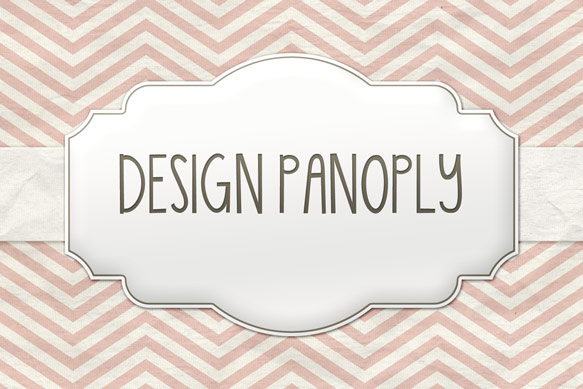
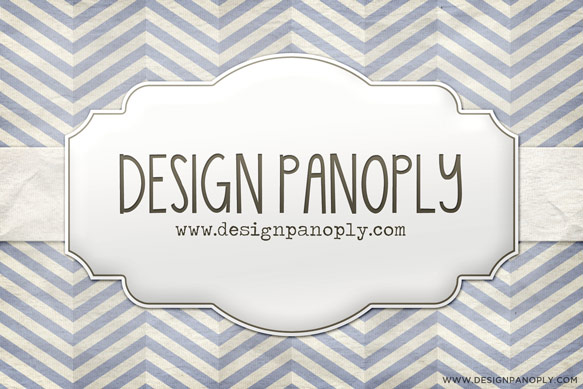
What We Will Be Making
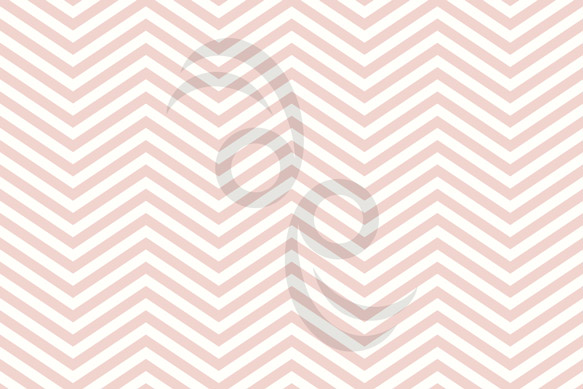
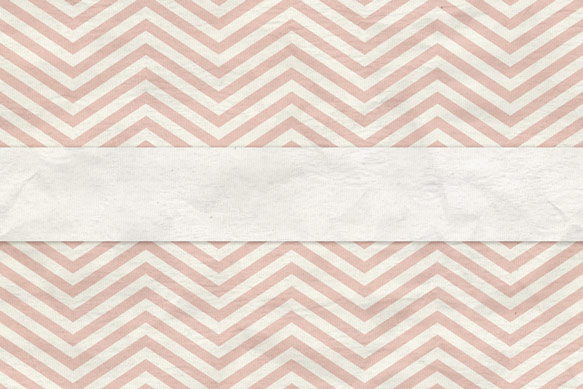
Step 1
Create a new document with dimensions of 1920 x 1280 pixels. Fill it with a vintage pattern of your choice. We used one of the patterns from our Vintage Chevron Stripes Pattern Pack 1.
You should end up with something similar to the image below, sans the watermark.
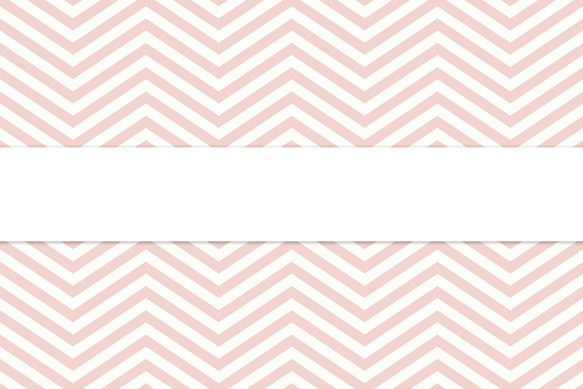
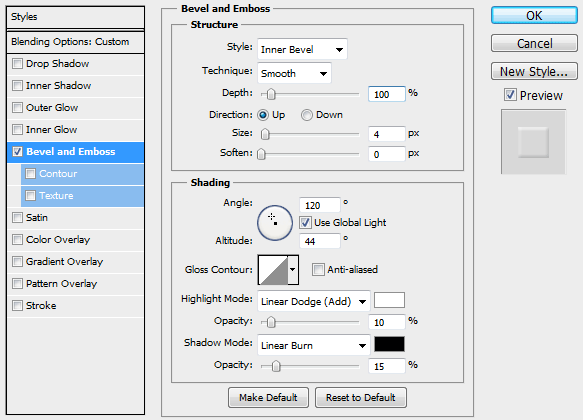
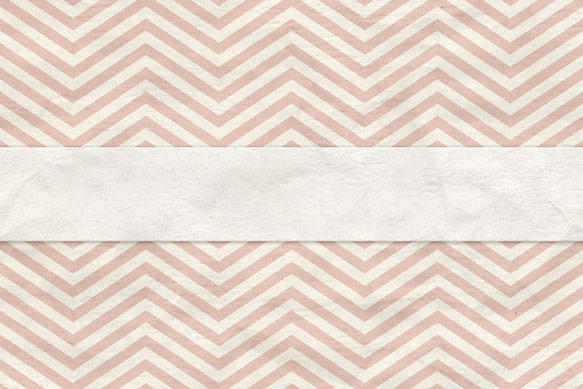
Step 2
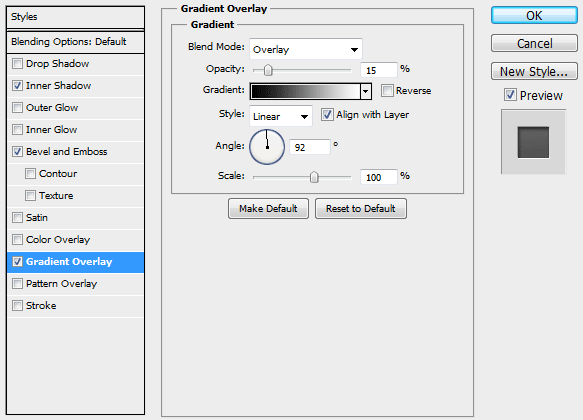
Draw a rectangle strip across the image and apply the following Layer Style settings.

You should end up with something similar to the image below.
Step 3
Next we are going to add some texture to give it a realistic look.
Copy a few subtle textures into your file. Fabric and paper textures work best. We used our Fabric Texture 006 and two textures from our Paper and Cardboard Textures Pack 1.
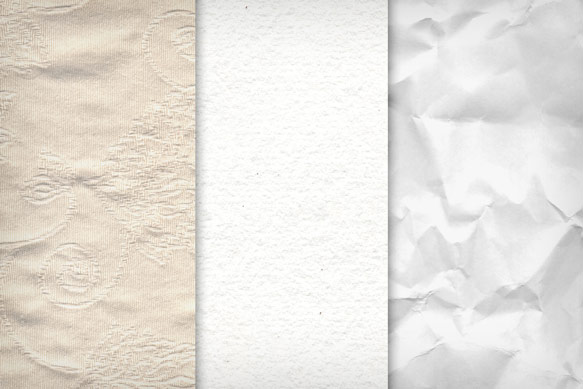
Adjust the blending mode and transparency of each texture layer until you achieve a look you like. We set ours to Linear Burn with varying transparencies or 25%, 35%, and 50%.
You should end up with something similar to the image below.
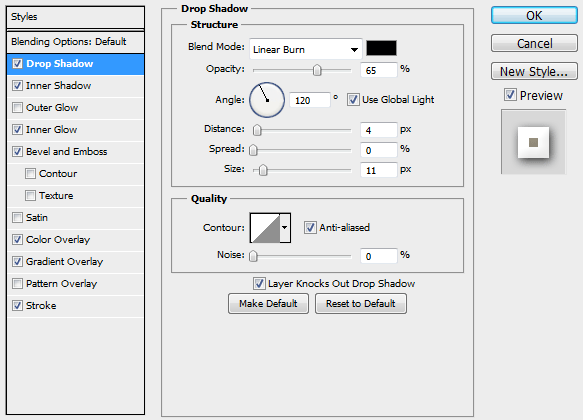
Step 4
To give the ribbon a slightly more 3D look, we will add a slight highlight and shadow to it used Bevel and Emboss.
Duplicate the rectangle strip and move it above all the texture layers. Set the Fill to 0% in the Layers palette and apply the following Layer Styles settings.
You should end up with something similar to the image below.
Step 5
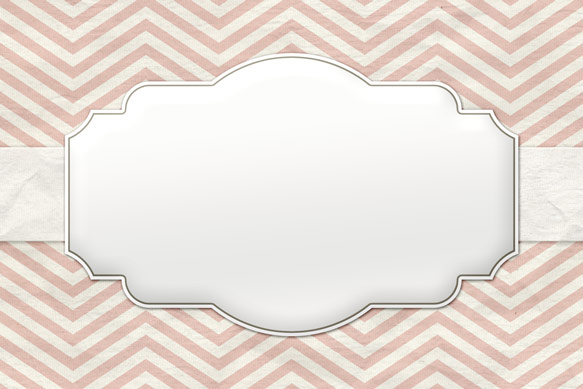
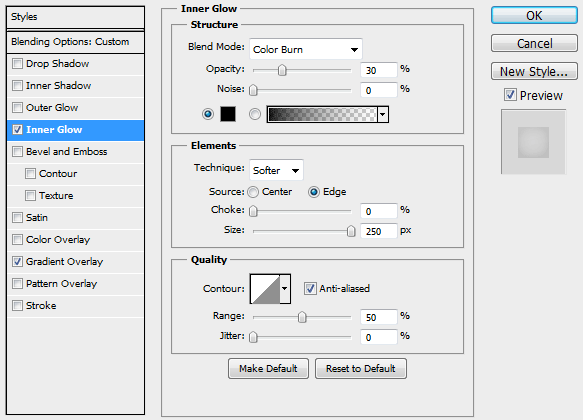
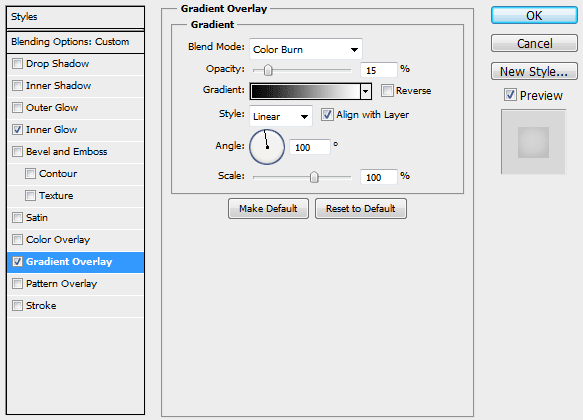
Copy the vintage vector frame of your choice. We used one from our Vintage Frames Vector Pack 1.
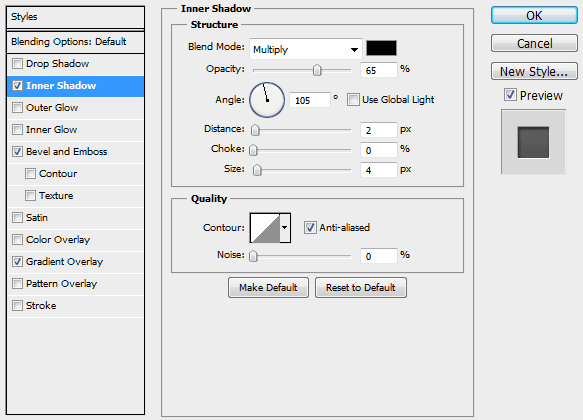
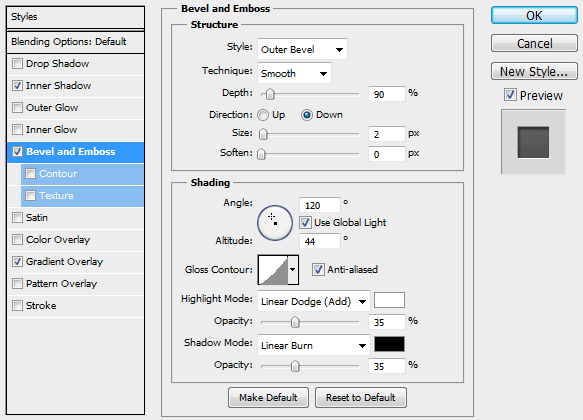
Apply the following Layer Style settings.

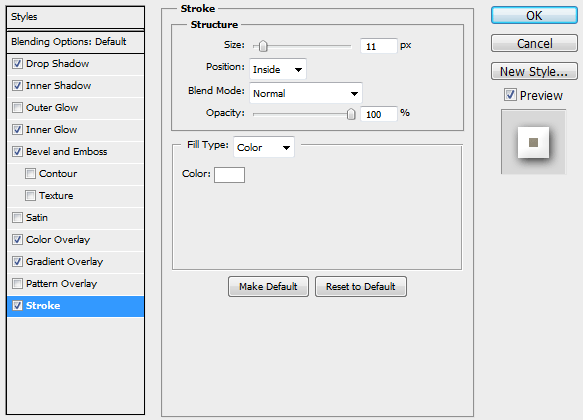
You should end up with something similar to the image below.
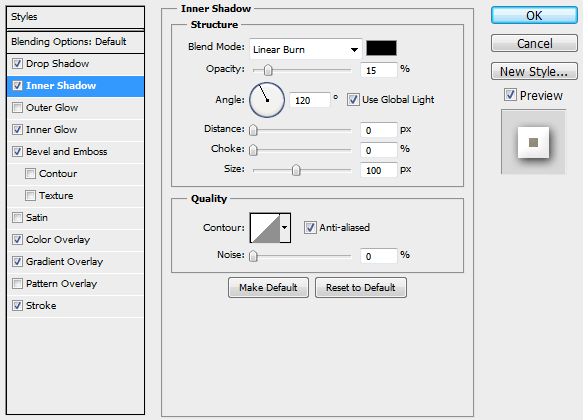
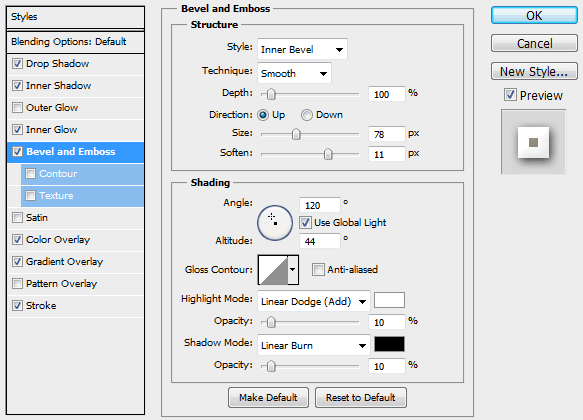
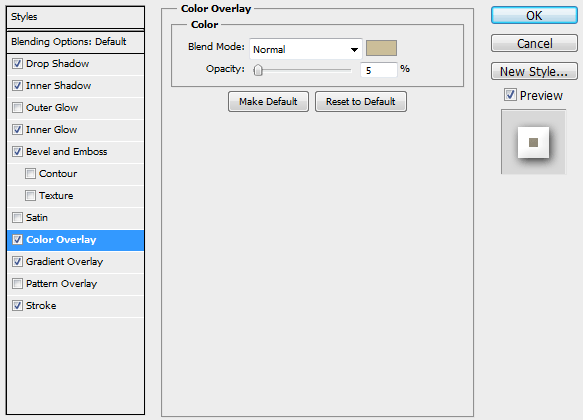
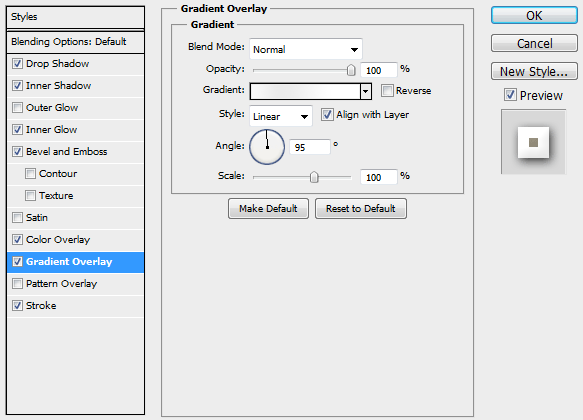
Step 6
Create your title text with the color #716B5B. We used the font KG Skinny Latte in all caps.
To get a subtle ebmossed effect, apply the following Layer Style settings.
You should end up with something similar to the image below.
Step 7
Create your tagline text in a smaller size underneath your main title text using the color #514C3D. We used the font Traveling Typewriter in all lowercase for our URL.
You should end up with something similar to the image below.

Step 8
Create a new layer above all the rest. Fill it with white and send the Fill to 0% in the Layers palette.
To add a slight vignette and give our image some depth, apply the following Layer Style settings.
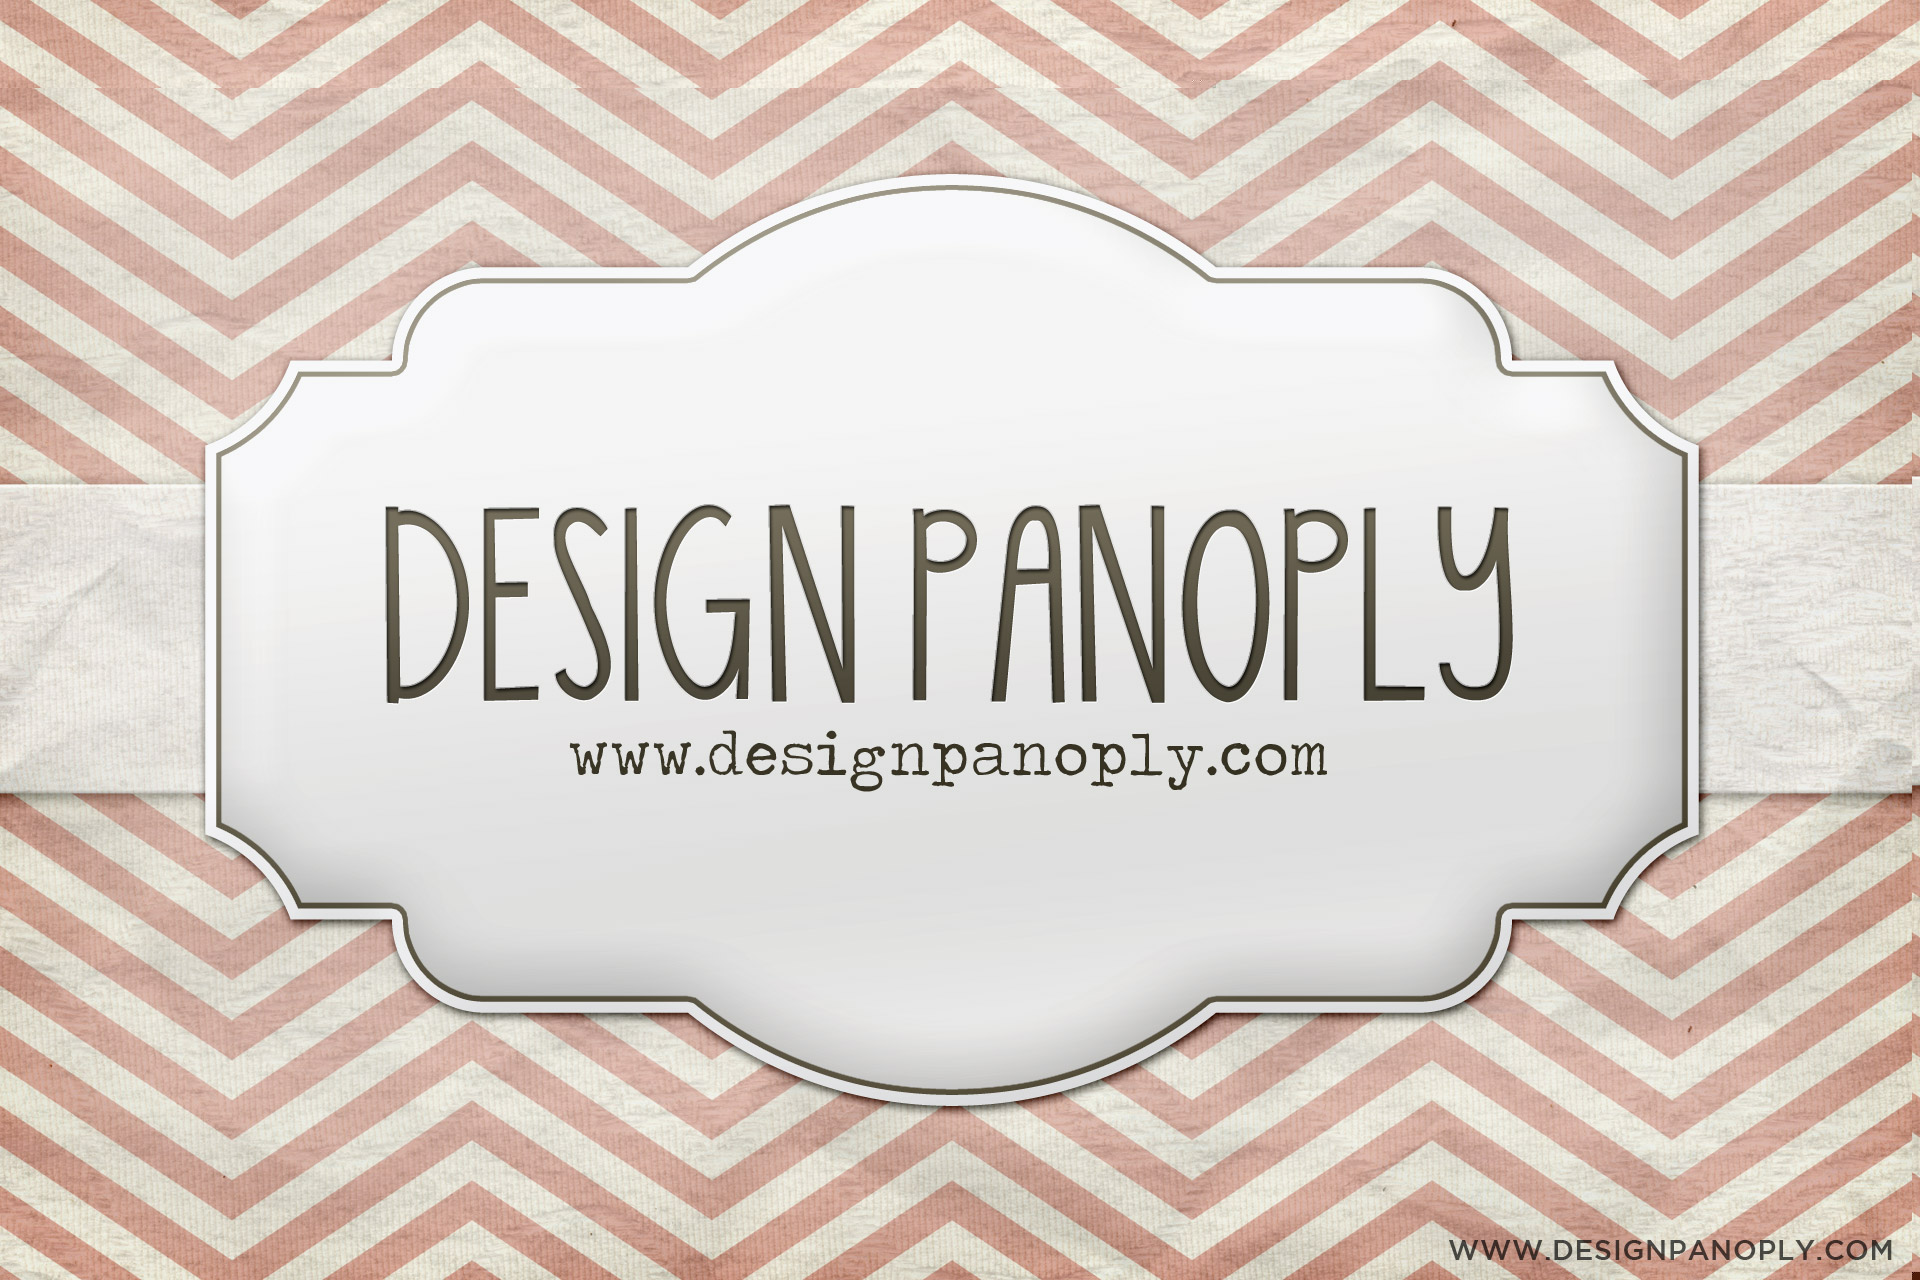
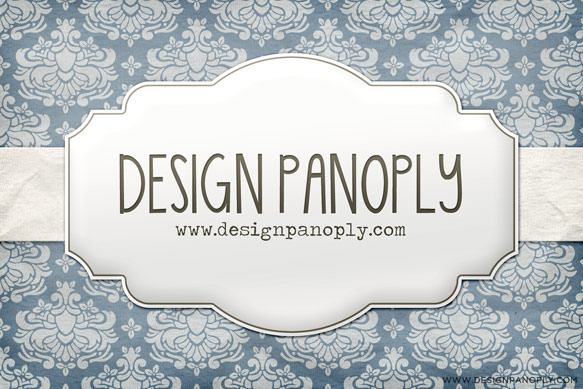
Final Image
Easy Pattern Changes
To change the background, simply copy and paste any pattern or texture just above your bottom layer.
You can get a lot of useful looks out of this template for projects in the future.
Show us your version in the comments below or join the conversation on our Facebook page.
Related Items
Grab a PanoPass now and get instant access to all these items and much more.

