How to Create a Snowflake Scatter Brush in Photoshop
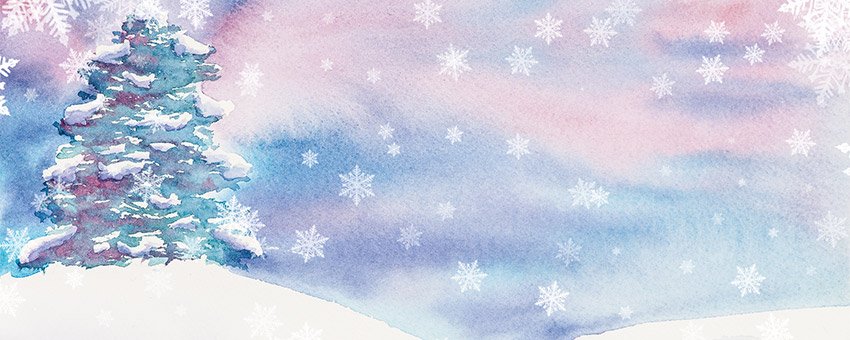
Watch Video Tutorial
Download full HD videos and tutorial project files with a PanoPass. You'll also get instant access to everything on the site, including products, and more.
Photoshop brushes can be a lot more than just stamps. How would you create a scattered snowfall? What about a thick, multi-colored bed of grass? Or animal fur? The answer is scatter brushes.
This tutorial will teach you how to take a regular shape and automate it to create snowflakes with randomized size, rotation, spacing, and opacity.
Step 1
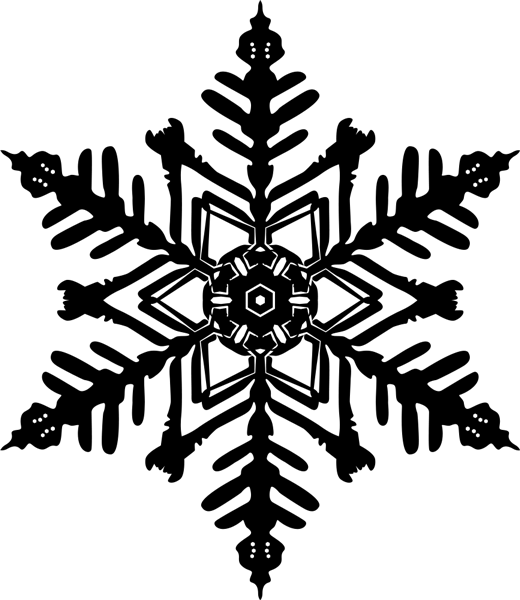
First you'll need a snowflake shape to work with. If necessary, invert the colors so the snowflake is black and on a white background.
Save and use the image below if you don't have one of your own.
Step 2
Click Edit > Define Brush Preset. Give your brush a name and click OK.

Step 3
Open the document you want to paint snowflakes on. In the Brushes panel, select the snowflake brush you just created.
At this point, if you click and drag on your canvas, you'll see that the brush is nothing more than a stamp.

Step 4
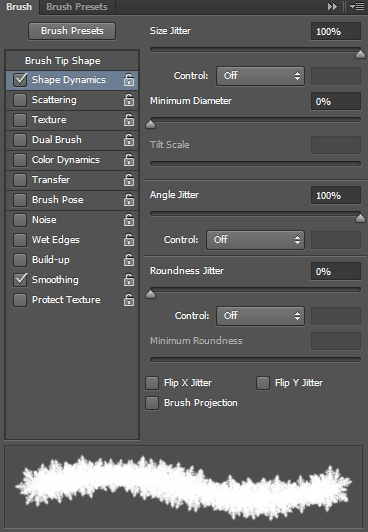
In the Brush panel, turn on Shape Dynamics. Set the Size Jitter and the Angle Jitter to 100%.
Now if you click and drag, you'll see that the angle and size of the snowflake is randomized as you paint.
Step 5
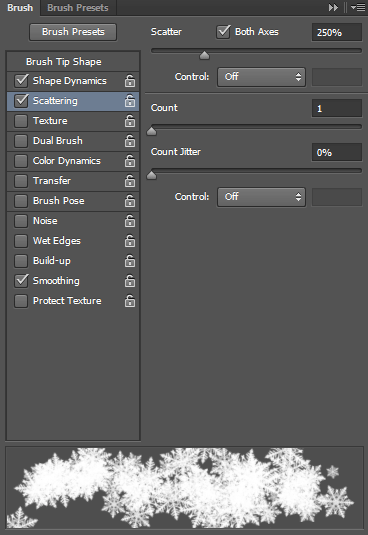
In the Brush panel, turn on Scattering. Set the Scatter to 250% and turn on the Both Axes checkbox.
Now if you click and drag, you'll see that the position of the snowflake is randomized around the center of your cursor as well.
Step 6
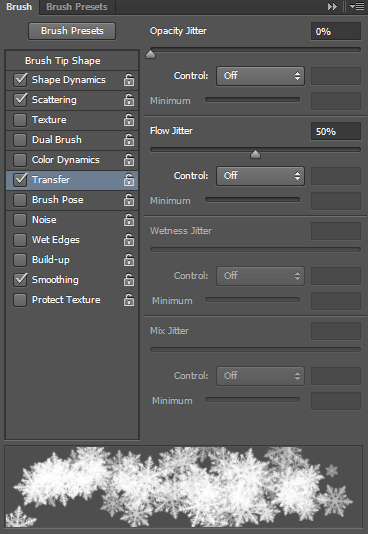
In the Brush panel, turn on Transfer. Set the Flow to 50%.
Now if you click and drag, you'll see that the opacity of the snowflake varies.
Step 7
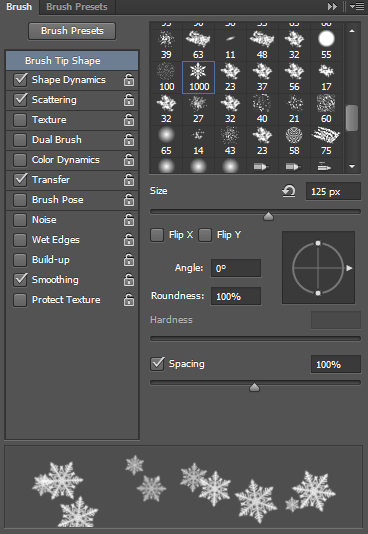
In the Brush panel, click on Brush Tip Shape at the top of the effects area. Set the Spacing to 100%, or turn it completely off to control the spacing of your snowflakes by painting at different speeds.
Final Image
Now you can create a few new layers and easily paint snowflakes of varying sizes to create the effect your after.
How did your snowflake scatter brush turn out? Did you use it in one of your designs? Share your version in the comments.


