Photoshop Brushes Advanced Features: Shape Dynamics

Watch Video Tutorial
Download full HD videos and tutorial project files with a PanoPass. You'll also get instant access to everything on the site, including products, and more.
This series is going to teach you in-depth how the advanced brush settings work in Photoshop. In this article, I'm going to explain how the Shape Dynamics settings work.
The Shape Dynamics panel lets you randomize certain aspects of your brush strokes like size, rotation, brush tip roundness and more. Combined with artistic brush tips, you can easily simulate realistic and organic brush strokes.
Make sure you also check out the previous article in this series, Photoshop Brushes Advanced Features: Brush Tip Shape.
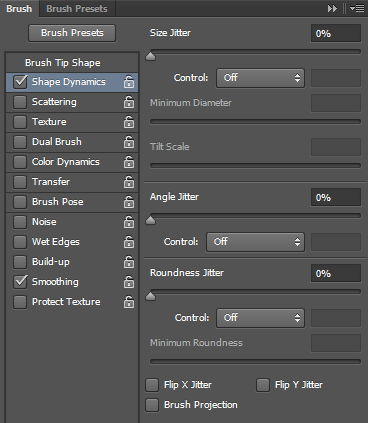
Where to Find Shape Dynamics Settings
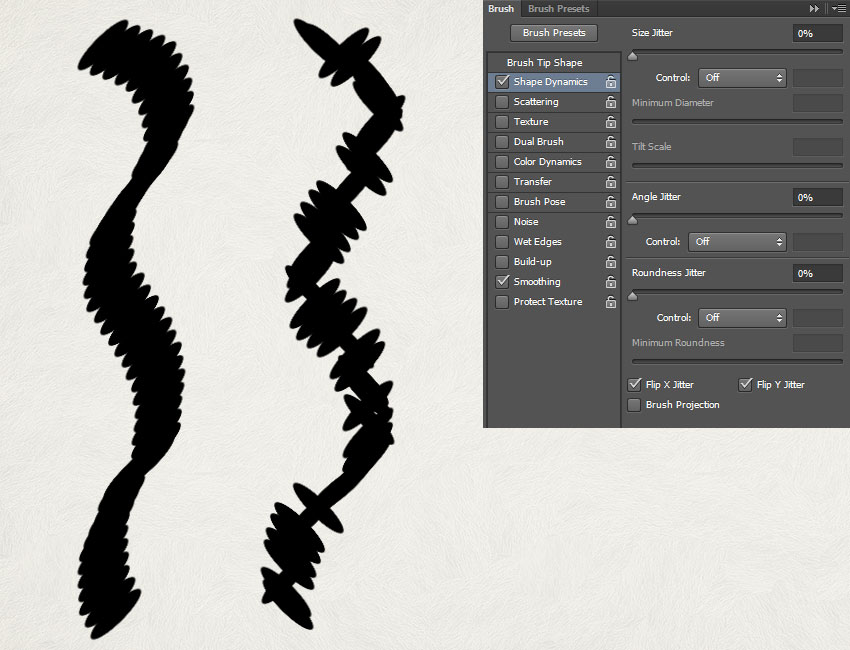
The Shape Dynamics settings are probably the most used settings in the advanced features of Photoshop brushes.
You can find them in the Brush panel by clicking Window > Brush (F5), then clicking Shape Dynamics.
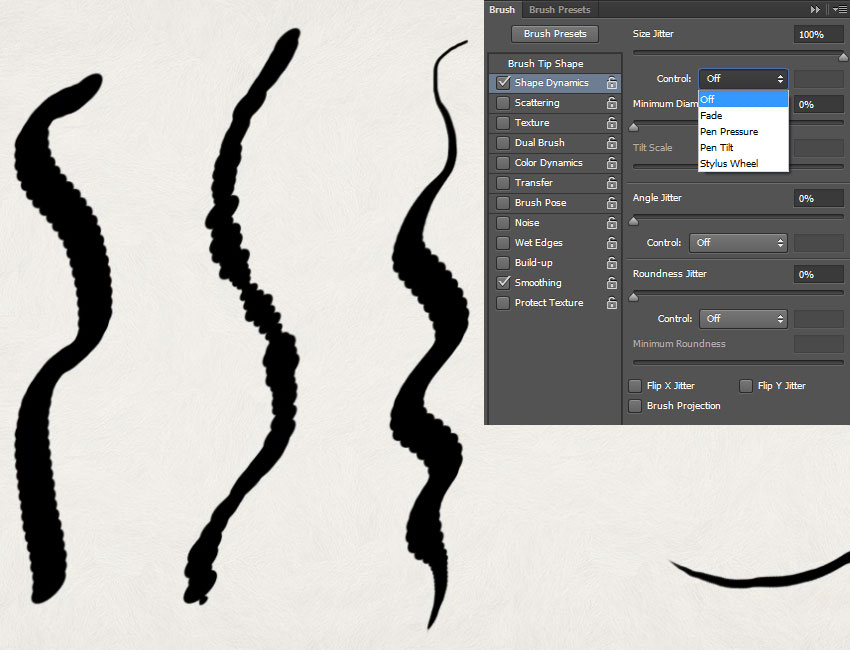
Step 1
The first slider you'll see is Size Jitter. Size Jitter randomizes the size of your brush tip as you paint. The higher the number, the bigger the variance.
The Control dropdown lets you automate the size of the brush based on a few settings.
Fade will create a stroke that starts off at full size and decreases in size as you paint.
Pen Pressure, Pen Tilt, and Stylus Wheel are used in conjunction with a graphics tablet. We'll cover these options in another tutorial.
The Minimum Diameter slider lets you set the minimum size of your brush, so it never becomes too small as you paint.
Tilt Scale is only available when you're using specific graphics tablets, so we'll skip that for now.
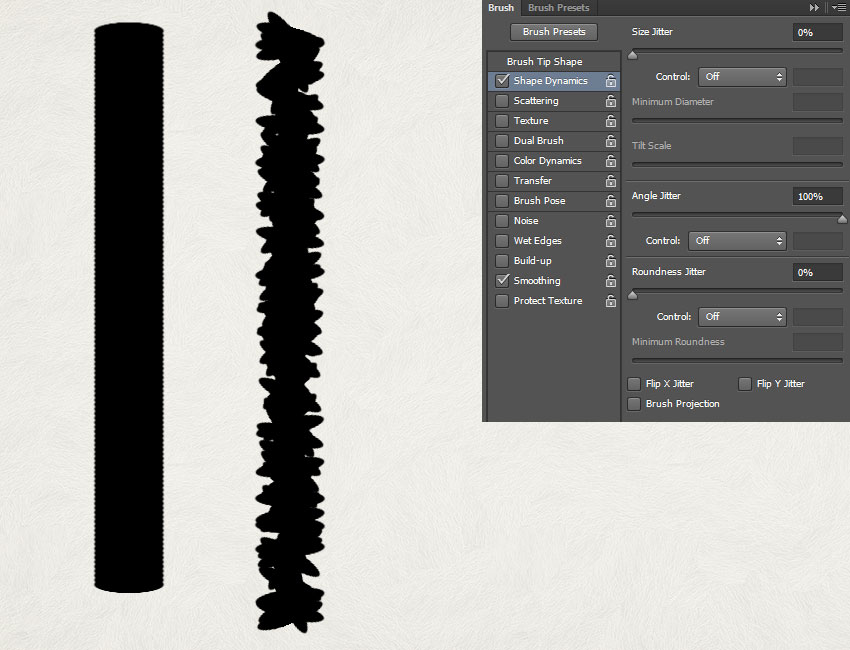
Step 2
Angle Jitter randomizes the rotation of your brush as you paint. If you set it all the way to 100%, your brush can rotate up to 360 degrees.
You can also use the Control dropdown to further customize Angle Jitter as well.
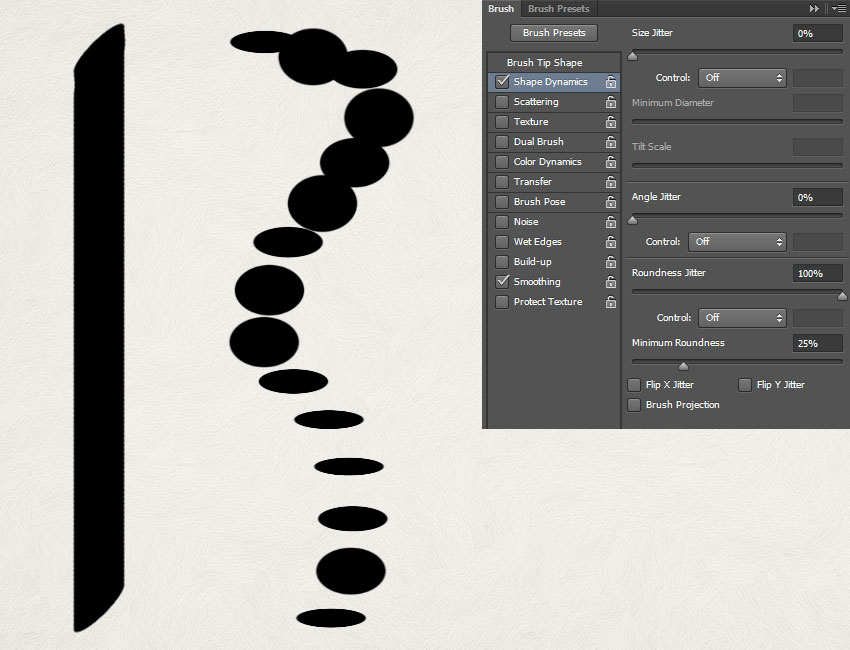
Step 3
Roundness Jitter randomizes the roundess of your brush as you paint.
In the following example, I increased the Spacing of the brush so you can more easily see how Roundness Jitter works as I paint.
You can use the Minimum Roundness slider to limit how flat your brush can get.
Again, you can use the Control dropdown to further customize Roundness Jitter.
Step 4
The Flip X Jitter and Flip Y Jitter checkboxes will randomly flip your brush along the X and Y axis respectively.
The Brush Projection checkbox is only used with graphics tablets, so we'll cover that in another tutorial.
Everything in the Shape Dynamics tab is pretty self explanatory. The best way to learn how each setting works is to experiment on your own.
Did you learn something new about Photoshop brushes in this tutorial? How do you use the Shape Dynamics settings in your work? Share your thoughts in the comments.